Sunday, February 24, 2013

"Podcats" ... a throw pillow


Helene Knott is a prolific designer of applique quilts.  One such set of blocks is her "Garden Patch Cats".  They are of cats depicted as various vegetables and are simply terminally adorable. As the "Garden Patch Cats" is probably going to be about 35 patterns, you can pick and choose which ones you want to put in your own quilt.

I don't NEED another quilt project right now.  At the current time, I'm working on my List of 17 Tops that need to be quilted, so I am NOT NOT NOT piecing any new tops!

But I still need something to do in the evenings when I am watching TV.   So when I saw Podcats, I knew it was something that I could do that wouldn't result in another quilt.  I could make it as a throw pillow instead!

Rather than use predictable, normal colors for the cats' faces, I opted to make them in red, purple and blue.  No, don't be aghast .. there's a reason for this!

You see, when our girls were little, I "color coded" them.  Just about everything I bought them was in shades of those colors so that even before they could read, they *knew* which items belonged to them simply due to the color.

So when I saw Podcats ... those three cute little cat faces ... I immediately saw them in those colors.  :-)

This was a very fast project for me.  Even faster than I had anticipated.  I started it on February 12th, after I returned from my Quilting Retreat.  I got the applique done in three days, took a break, then finished it up yesterday (February 23rd).

I'm surprised but pleased that this project is done ... but now I need another project for the evenings!


That picture is just a teaser! For all the gory details, links and more pictures, please visit my web page for the Podcats throw pillow.


Wednesday, February 20, 2013

Outdoor Rotisseire Chicken: it's what's for dinner!


Mr. Pirate is a man of many curiosities and abilities.  Of late, he has been enamored of outdoor cooking fires.  He built us a keyhole fire pit, around which we have had many enjoyable campfires, right in our own backyard.

Tonight, he skewered a chicken (no! not one of *ours*!) and cooked it over a battery powered rotisserie.  He's doing this not only for the novelty aspect but also for when we go camping this summer, doing a rotisserie dinner will be on our menu.

This is the chicken when it first started out ... looking kinda pale and inedible.

But look at it an hour later!  Nicely browned and well on its way to be eaten.

Here's what we were entertained by whilst sitting by the fire, enjoying each other's company and the ambiance.

And, dang, if this isn't us!  A toast!  Skol!


Monday, February 11, 2013

Hawaiian applique Forever Project: top finished!


Honestly, "they" just don't make Forever Projects™ like they used to.  :-)

This pattern is "You Are In Our Hearts" from Pacific Rim Quilting Company.  My notes tell me that I started this 42" square applique project on 1/9/2013.

While I was at my annual quilting retreat in Phoenix, AZ this past weekend (2/10/13), I was able to finish it due to working on it at the airport, on the flight and at the retreat.

That's just about ONE MONTH.  Wowsers!  :-)

I just love it.  Love it.  LOVE IT.  :-)

The only drawback is that it *is* 42" square.  This is a great size for a wall-hanging  ... and in fact, this is what the pattern is designed to be ... but I don't particularly want another wall-hanging.  I have lots of wall-hangings.  I love them all.  I like looking at them all.  I don't want to take ANY of them down to look at a new one ... and I don't have any more wall space.

42" square is also a great size for a toddler quilt but there isn't any toddler in the world that is going to get THIS applique quilt!  Not even a future grandchild, who isn't even on the horizon at this point.  (note to daughters: NOT that I'm even suggesting this possibility, so stop being anxious about it. :-)  )

Yeah, I know ... these really are serious problems to deal with, huh?  :-)

So ... I was thinking of the possibility of adding on a top & bottom border.  I have enough of the base fabric to do so.  I have more of the batik fabric to so a linear Hawaiian applique border.  But, I am woefully uneducated as to what an appropriate Hawaiian applique linear border should look like. 

I've been doing some Google/Image searches and I've sent an email (with a picture) to Nancy Lee Chong (the designer & co-founder of Pacific Rim Quilting Company) for advice.

For the time being, the top will be put in the WIP stack so I can cogitate on the solution.  It's also time to look at the List of 17 UFOs and decide who wins the "tag!  you're it" game. :-)


Wednesday, February 06, 2013

Grapes (and not 'of Wrath'!)


I've mentioned before that I have list of 17, count 'em *seventeen*, UFOs that I want to finish up before I start any new projects.  I've been making pretty good progress with a current count of 6 of those projects now completed.  It's sure a good feeling!  :-)

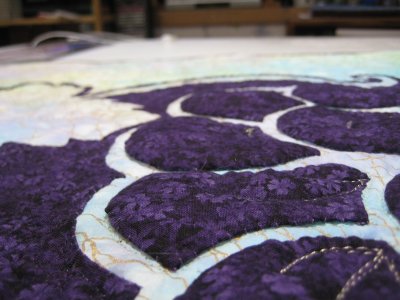
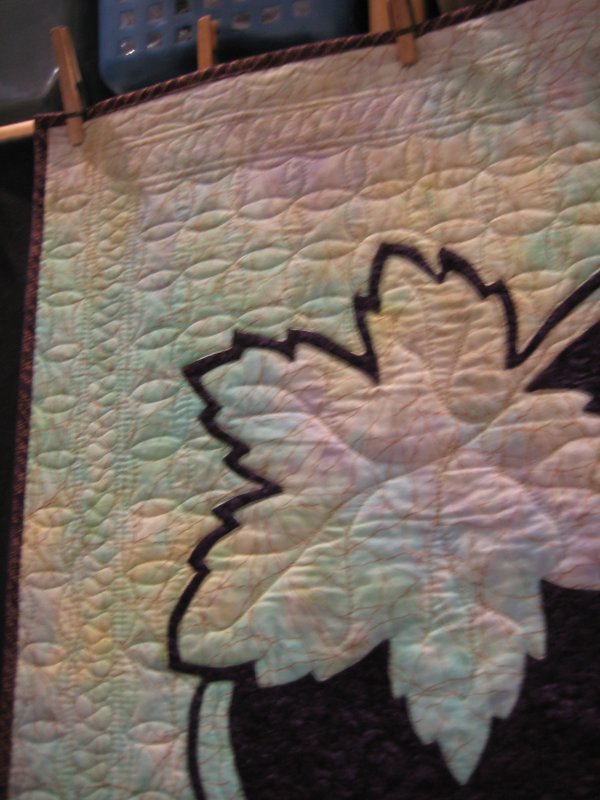
This needle-turn wall-hanging is one of the 6 that I've completed.  The pattern is from Nancy Lee Chong of Pacific Rim Quilting Company (this pattern is about half-way down the page).  You don't need to do needle-turn, Nancy offers other applique methods as well.

But back in June of 2012, I need a Forever Project™ and this was it.  Since it was a Forever Project,  I wasn't concerned about how long it would take me.  Even then, I was finished a month later.

Seriously, I love, *love*, LOVE Nancy's needle-turn method!  It just makes sense to me; it's uncomplicated, not messy and *no pins*!  :-)

Once the top was done, it got put away, as I wasn't in the mood for quilting.  But now that I am working from my List of 17 UFOs, this top popped to the top and now it's getting its 15 minutes of fame. :-)

Since this wall-hanging is for us, I wanted to do something different and not the same ol/same ol ... kinda like expanding my horizons.


So, I did a faux-trapunto on the grapes.  I've done this technique before and it turns out so nicely.


The new-to-me was quilting a design in the negative space.

What??  "That's not new!", you say.  And you'd be correct but .. it *is* new to me.

I usually quilt a background filler in the background space.  That's what background designs are for, right?

Thinking of an overt design was the new part.  I chose to "frame" the applique in a triple frame: narrow/wide/narrow.  On either side of the frame, I quilted Continuous Curves.

When I was marking the foundation grid prior to stitching the Continuous Curves, I discovered that I was less than accurate in my placement of the applique fabric on the background fabric.  ::sigh::  I ended up with less space at the top than at the bottom.  ::shrug::  I'll live with it.

This project is also my February finish for the Lovely Year of Finishes.

Those pictures are just teasers! For all the gory details, links and more pictures, please visit my web page for the Grapes wall-hanging.


Friday, February 01, 2013

Lovely Year of Finishes: February 2013


Melissa of Sew BitterSweet Designs  and Shana of  Fiber of All Sorts started an interesting concept to encourage us quilters to get some of our long-standing UFOs completed.  It occurred to me that this approach could be applicable to any crafter with a backlog of projects, but this one is specifically organized for quilters.

To participate, you pick one UFO for the month, blog about your intention to finish that UFO *that month*, link the blog post to the Year of Lovely Finishes linky party.  Then ... FINISH THE UFO.  You gotta do that. :-)

When you've finished it, blog about it, link the finished UFO blog to the linky party .. voila, you're done for that month.  As an incentive to finish, each month has gifts that were donated by the sponsors; they will be awarded on a random number basis.

Sadly, I missed out on January; I hadn't read about the program.  But here I am for February!

Therefore, my UFO to finish is .... Grapes.   Grapes is a needleturn applique wall-hanging designed by one of my favorite designers, Nancy Lee Chong of Pacific Rim Quilting Company.   Over the years, I had tried many different techniques for applique but it wasn't until I learned Nancy's technique that it finally "clicked" with me.  Now, I'm not intimidated at all by needleturn applique projects.  They make excellent Forever Projects ™ !  :-)

I started this project in January 2012.  I actually finished the needleturn part so the top is technically done.  But, being the complete lamer that I am, I let the top languish in the UFO pile since then.

Since this is my LYOF February project, I am now deciding on the quilting design to do.  Nancy quilted her's in echo quilting, but that doesn't float my boat.  Once the quilting has been decided on, it'll get loaded onto Lizzie and quilted.

woo hoo!!!   I'm on my way!  :-)


Wednesday, January 30, 2013

review: "Build Your Best Log Cabin" ebook by Fons & Porter


I, like many other quilting bloggers, received an email request from Eric Wolf, the Online Media Coordinator for Fons and Porter, to review their recent Log Cabin Book, given in a PDF format.  I was not as prompt as I should have been in reviewing their book, so I am rectifying that lack of good manners now.

The Log Cabin layout was one of the very first quilts that I made (way back in 1978 or so).  Over the years, I have made others, in variations of the basic layout.  Log Cabin is a wonderful layout to make, for both the novice and experienced quilter.

The Fons & Porter "Build Your Best Log Cabin" ebook presents an interesting collection of Log Cabin history, antique and modern photographs, traditional patterns and patterns for modern variations and technique tips.

The basic patterns they provide are for the Traditional, Courthouse Steps and Chevron blocks.

Using the Traditional block, they provide six different layouts, most of which experienced quilters will be familiar with.   A strip cutting chart to create the Traditional block in five different sizes is provided. 


Then, for a contemporary twist on the Traditional block, a thoroughly delightful layout by Ricky Tims is provided.  Ricky Tims' quilt pattern combines a Bear Paw block with the Traditional Log Cabin block for a unique look.  Combining the Log Cabin block with a pieced block is sheer genius.  Of course, Ricky's marvelous quilting in the wide borders sets the whole quilt off.  I was pleased to see that a section of the book was devoted to the technique that Ricky used to do his quilting, which involves using specialty thread in the bobbin and quilting from the back.


A second contemporary layout using the Traditional Block by Shon McMain was provided that presents the illusion of woven strips.  It is a simply outstanding layout. 

Accompanying the layout are tips that make creating this quilt easier.


A pattern for a conventional quilt using the Courthouse Steps version of the Log Cabin block is given.  You can make the blocks in 5 different sizes.


A contemporary layout for the Courthouse Steps block is provided.  Although it really, really, really is the Courthouse Steps layout, this version is simply framed squares.  You might get a better handle on making these blocks if you think of them as framed squares rather than Courthouse Steps.


The last version of the Log Cabin block is the Chevron.  This is just a half Log Cabin, set on-point.  Or, you could think of it as the center window of the Log Cabin being shoved into a corner and the rest of the block built around it. 

The sample layout shown is a scrappy version, which is probably historically accurate.  I can see this version done in a monochromatic palette with the steps going from light to dark, which would result a modern twist.


The alternative version for the Chevron block is provided by master quilter, Marti Michell, in a doll quilt size.  Marti's layout gives the illusion of a chain link fence.

At the end of the book, detailed directions are given for binding.  One set of directions is how to include a strip of piping along with the binding for a shot of color.  I've seen this technique used in real quilts and think it provides a subtle detail that might not initially register but subliminally you think, "wow ... that's an interesting quilt!".  It's that small amount of color in the binding that does it.  It's a detail that is definitely worth remembering for your next quilt.

Unfortunately, I don't care for the directions that are presented in this book.  They have you sew an actual piping strip, which makes the binding area very bulky and stiff.  While I did *not* make a sample using their directions, I will assume that if you follow them, you will end up with a lovely piped binding.  But it will be bulky. 

Instead, I prefer to use the 'faux piping' technique, which yields the same visual result without the bulk.  There really isn't any reason to use actual *piping* alongside the binding when all you really want is the color spot.  There have been several blogs that give you excellent tutorials on sewing the 'faux piping' ... just Google for them.

The next section on binding is how to make that last seam .. the one that joins the two tails .. so it looks the same as all the other seams in the binding.  If you have joined your binding strips in a diagonal seam, then these directions will show you how to make that last seam a diagonal one also.  A diagonal seam distributes the bulk of the seam allowances over a distance so there is no ugly lump at that last seam.  This is the preferred method to joining the tails.

The theory is excellent; I use a diagonal seam for joining the tails myself.  BUT ... the technique presented here is unnecessarily convoluted and complicated.  A beginning quilter is going to be intimidated by all the picky little steps that need to be done; an experienced quilter is going to know there is a better, simpler method to achieve the same result.

I do not recommend the book's technique for joining the tails of the binding.

In conclusion, I can say that if you obtain this book for the patterns themselves, you won't be disappointed.   While the directions for creating the Log Cabin blocks do not lead you by the nose in the assembly process, anyone with a modicum of common sense will be able to follow the graphic presentation of what strip to sew where and when.

This book also assumes the quilter is not a rank beginner.  It does not give you the basic "this is a 1/4" seam allowance" sort of direction.  But once you've gone beyond being the "Beginning Quilter", anyone will be able to follow the directions given in this book.

I truly enjoyed seeing the contemporary versions presented by Ricky Tims, Shon McMain and Marti Michell.  It's always wonderful to see how others are able to think outside the box (or out of the Log Cabin, in this case!).

As part of this review from me, I am able to provide you, my Dear Reader, with a link for you to download a free PDF version for yourself here


Tuesday, January 29, 2013

current Forever Project: Hawaiian applique


I always have a Forever Project ™ going.  My Forever Projects are hand-work that I do when I am away from the sewing machine or quilting machine, such as on road trips, doctors appointment waiting rooms, Little League games, skating practice ... you get the idea.

It gives me something constructive to do with my hands and eventually results in a finished project.

The Forever Project that I *had* been working on (a hand-pieced, vertical diamond column top) was finished about 2 weeks ago.   Therefore, I needed to start a new Forever Project.

I chose Pacific Rim Quilting Company's "You are in our hearts", a Hawaiian applique wall-hanging (photo at left is from Pacific Rim Quilting Company's website).

I just absolutely LOVE Nancy Lee Chong's method of needle-turn applique.  I originally taught it to myself, using her "Peace" wall-hanging (scroll about half-way down that page).  It was the first time that a needle-turn applique method "clicked" with me.  The first time I made that wall-hanging, my oldest Dear Daughter expressed her liking for it, so I gave it to her.  But that left ME bereft, so I eventually made a second one for myself.

I also made "Grapes" (same page as "Peace" ... scroll about 2/3rds the way down the page), which is the project that is currently loaded on Lizzie for quilting.

I had the FANTASTIC opportunity to take a hands-on applique lesson from Nancy Lee Chong herself, when a slot opened up in a guild's workshop.  I am not a member of the guild, so I was very, very happy and grateful to have that opportunity. 

Nancy Lee Chong is simply a wonderful instructor.  Very patient, very thorough, with lots of samples to show the students and ever-willing to show each student how to properly use her technique.

I LOVE LOVE LOVE her technique because you don't have to use pins to hold down the applique!  The raw edges are hand-basted down.  You may think that this is a wasted effort but it is NOT.  Once you have those edges basted down, your portable needle-turn project will never EVER stick you.  :-)   I *highly* recommend her patterns and if you ever have an opportunity to take a workshop or lesson from her, do not think twice about it; sign yourself up immediately!

So ... back to my current Forever Project, "You are in our hearts".  This pattern had been sitting in my To Do file for quite some time.  From my stash, I found what looks like a hand-dyed batik for the applique and a mottled, neutral Fossil Fern for the base fabric.  It took me one afternoon to do the preparation for the project and it was then folded up and put into my Forever Project tote box.

The tote box has all the supplies necessary for the current Forever Project, whatever it is.  The basic supplies remain the same: small, sharp scissors; pin cushion, needles, thread.  Other supplies vary with the project.

I have been working on this project only for about 2 weeks.  Under normal circumstances, this sort of project would last me quite a while.  These days, I only work on it when I'm at my Dad's house for my weekly visit.  As a result, the progress is understandably slow.  This isn't a problem because, after all, this *IS* a "forever project"!  :-)

But, as events happened, I had a weekend of airplane travel and considerable downtime once I arrived at my destination.   During the waiting time at the airport, during the flight and at my hotel room, I was able to work a considerable amount on the project.  As a result, I don't think this specific Forever Project is going to take "forever".  :-)

Here is my progress so far ... the light pink outlines are the edges that have yet to be needleturned.  As you can see, it's not a whole lot of work to be done.    I have a quilting retreat that I'm going to in February ... this project is coming with me, as the retreat involves more airplane trips .. so I suspect that this project isn't going to take quite as long as other Forever Projects.  I might even need to find a NEW Forever Project once I return from the quilting retreat!  :-)


Thursday, January 24, 2013

Support Your Local Quilt Store Day


Well, today is "Support Your Local Quilt Store Day".  I hadn't intended on making a run out there cuz Lord knows I have enough fabric stockpiled and I'm back to working on my List of 17 Unquilted tops.

Which brings me to why I patronized my local quilt store: thread.  I just don't have a whole LOT of quilting thread in various weights.

The project that I'm going to be quilting next is called "Grapes", a needle-turn applique wall-hanging that I blogged about here.    I've been studying this wall-hanging and .. oh hooray! ... have come up with a quilting plan!  I'm glad this time it was fairly easy to decide what to do.

BUT ... I didn't have the proper colors nor the proper weight thread, hence my trip to the local quilt store.  My mission was successfully accomplished, I'm happy to say.

The thread I picked up is Superior's "Bottom Line" in light green (#614) and  deep purple (#631).  They are going to be used for the stitch in the ditch around the appliques and for stitching the background designs. 

For this wall-hanging, I don't want the quilting per se to stand out.  Since Bottom Line is so fine, it will work out wonderfully.   I didn't buy Superior's "So Fine" line because it doesn't have the shades that I need.

The one other thread that I'll be using for the wall-hanging is Fil-Tec's "Glide" thread.  I've used this on a couple of other quilts and am simply in love with it.  It's a trilobal polyester and literally slides through Lizzie .. no tension problems at all.   I'll be using this thread for some accent quilting lines. 

I'm working on my local quilt stores to start carrying it. :-)

So, that was my stimulation of the economy today.  Next up: marking the wall-hanging so that I have some quilting guidelines.  I can see, in my mind, so clearly how I want this wall-hanging to look like.  I have every hope and anticipation that my vision will become a reality.

I also have my fingers crossed. :-)


Tuesday, January 22, 2013

At the end of the list! The last two webpages!


I can hardly stand the excitement!  I can't believe that I've actually finished the backlog of webpages!  Although it's only been about 2 weeks, it seems as though it has been FOREVER that I've been working pages for my quilted things.

So, let's get to it ...

Last Autumn, I was commissioned to make two throw pillows to coordinate with a *hand-quilted* king-size quilt.  No, I did not quilt the quilt; I don't do hand-quilting.  (or at least, I do it under extreme duress).

I made the two, an 18" knife-edge throw pillow, whose layout duplicates the blocks in the quilt, although the quilting I did on the pillow is different from that of the quilt.

A second, 14" knife-edge pillow was made to compliment the bigger pillow and the quilt.

The focus of both pillows is the hand-embroidered center.

That picture is just a teaser! For all the gory details, links and more pictures, please visit my web page for the two throw pillows

AND THEN ... drum roll, please!!!   ... the last item on the list!  The last backlogged webpage!   Wooo hooo!!!

This one is so simple, so easy that I'm glad I made them.  It reinforced to me that a very satisfying quilt does NOT need to be big nor fancy nor custom quilted.

It can be as simple a single piece of yardage.  For many reasons, this was one of the most satisfying quilts that I've made.  I call them "whole cloth" quilts .... not because they are reminiscent of the incredible quilting in the whole cloth quilts that we normally think of .. but because they both were made of one whole piece of yardage.

For two very special boys.

That picture is just a teaser! For all the gory details, links and more pictures, please visit my web page for the Whole Cloth quilt.


And now, with the publication of the last of the backlogged webpages, I can finally return to quilting!   I can continue working from the List of 17 Tops to be Quilted.   Yes, this is another backlog list.  ::sigh::  I honestly look forward to the time where I can piece a quilt, quilt a quilt and publish a page.  In that order.  For every quilt.

Hope springs eternal. :-)


Monday, January 21, 2013

the Scrap Assassin quilt


How about one last quilt for today?  I knew you'd be interested. :-)

This is another scrap management quilt, similar to a God's Eye block.  My notes say that it's called "Scrap Assassin" but research shows that it is NOT any of the quilt patterns currently going by that name.

The hallmark of this block is that the center diagonal strip is always the same width, although the color varies from block to block.  Capping each end of that center diagonal is a black triangle.  The secondary pattern that emerges, when you sew the blocks together, is all those black triangles form a black diamond amidst the riot of color.

Because this top is *so* busy, I used a pantograph for the quilting.  It was very difficult to photograph the stitching on the quilt, so what you see is what you get. :-)

That picture is just a teaser! For all the gory details, links and more pictures, please visit my web page for the Scrap Assassin quilt.


How about a Friendship Braid?


I think I can see the end of the list of webpages to make!  Oh hooray!  :-)

This Friendship Braid was another attempt at stash management.  The braid was constructed with half-hexagon pieces and is one of the easiest techniques I've used.  Even a beginning quilter would be able to make this braid with her eyes shut. :-)

I used one of Darlene Epp's designs from her "Pocket Guide to Free-handing: Borders & Sashings" for the yellow sashing.  A variation of a design I found "someplace" was used on the braid portion.  Stitch in the ditch stabilizes *everything*.

While the top was pieced in July 2012, the quilting waited until early January 2013.

If you wander on over to the webpage, you'll find links to the Missouri Star Quilting Company video on making the half-hexie braid, to Darlene Epp's wonderful books and lots of pictures!

Those pictures are just teasers! For all the gory details, links and more pictures, please visit my web page for the Friendship Braid: half-hexies quilt.


"Evening Flight": a wall-hanging


This is another quilted project that I finished last year, June 2012 to be specific, but never made the webpage until now.  (You're going to be seeing several more blog entries in this vein, so you have been warned!)

A cousin of Mr. Pirate has a job with one of the hot air balloon companies that operate in the Napa Valley of California.  Napa Valley is a premier wine grape growing area and hot air balloon companies have taken advantage of how picturesque it is.

I was in the middle of working on another hot air balloon and grapes quilt when Mr. Pirate asked if I would make such a thing for this cousin.  I agreed and found this pattern, "Evening Flight" by Barbara Jones.

I must admit that because I am usually making and quilting LARGE quilts, I am continually surprised at how FAST small projects can be.   Sometimes it just takes a while for reality to sink in.  :-)


Evening Flight was a delightful project to do.  Departing from my usual construction techniques, I  fused the appliques and stitched a tight satin stitch over the raw edges.  Quilting was minimal but appropriate.  I even remembered to use one of my specialty templates to stitch a single rope cable in the border!


Those pictures are just teasers! For all the gory details, links and more pictures, please visit my web page for the Evening Flight wall-hanging.


Sunday, January 20, 2013

Snakes! Slithery Snakes!


Now before y'all start muttering to yourselves that it sure seems as though I am producing A LOT OF QUILTS these days, let me make this perfectly clear .... not true.  I am making a lot of WEBPAGES these days!

You see, all of the recently posted quilts (and the ones to come in the near future) were all pieced, quilted and bound *LAST YEAR*.  I just never made the accompanying webpage to share the quilt.

Yes, I am a lamer. :-)

So... for this quilt .. Slithery Snakes ...

One of Mr. Pirate's nieces was about to have her first baby.  Well, kinda/sorta about to.  It was March when I found out and June when the baby was born so instead of making a baby quilt to catch up with the baby, I was able to make the quilt ahead of time!

Since we knew the baby was going to be a boy, I could make a  "boy" quilt.  What is more "boy" than snakes?  :-)

Here we have 3 columns of intertwined snakes surrounded by a border of alligators.


I used a pantograph called "Rain", designed by Lisa Calle.


Those pictures are just teasers! For all the gory details, links and more pictures, please visit my web page for the Slithery Snakes quilt.


Golden Angel wall-hanging: another previously finished proejct


During last year's (2011) Quilting Retreat in Phoenix, AZ, I found a pre-printed panel from Michael Miller.  It was of an angel holding a lamb.  It was simply spectacular.  I knew that one of Mr. Pirate's cousins would love it *and* appreciate the work that would go into making something with it.

Michael Miller's company does have a suggested project but it really is dismal.  So, I made up my own. :-)

I bordered the panel with Dupioni silk (*NEVER AGAIN*), put machine embroidered words (individually stitched letters put into Cathedral Window blocks) along the right side and along the bottom.

In the bottom right corner, I put an embroidered angel by Sonia Showalter.

Even with the problems I had with longarm quilting the Dupioni silk (*NEVER AGAIN*!), I think it came out very nicely.


Those pictures are just teasers! For all the gory details, links and more pictures, please visit my web page for the Golden Angel wall-hanging.


Wednesday, January 16, 2013

It's what's for dinner!


Mr. Pirate loves his toys.  Almost anything mechanical, electrical and/or computerized is fascinating.  Especially if they can all be found in the same item. :-)

Mr. Pirate gets guy-stuff catalogs in  the mail, touting all the latest "manly" stuff.  One item that caught his eye was a battery powered rotisserie (that's two out of the three attractions).  You might ask, "why on EARTH would he be interested in such a thing?????"   But, I tell you, there IS a reasonable rationale!

You see, the Pirate family likes to go tent camping.  We have done that for our annual family vacation since Mr. Pirate & I were married, lo those many 34-odd years ago.  Yes, several of those years were VERY odd, indeed. :-)

When I was growing up with my parents and siblings, that's what WE did for vacations.  Mr. Pirate was slightly more rustic, in that he went back-packing.  I gave back-packing the old college try when dating Mr. Pirate but I'm a wuss ... it just wasn't my cup of tea.  But I love camping.

So, Mr. Pirate is always on the lookout for camping gear.  Sometimes weird camping gear.  Some of the items he buys are experimental and don't work out as envisioned.  Some have become part of our standard camping equipment.

You see, as we are tent camping, we don't have electricity.  This cuts down our options on cooking quite a bit.  Mainly we do stovetop cooking and Dutch oven cooking.  Typically speaking, we have a large group when we camp ... sometimes between 15-20 people.  This also cuts down our options for cooking, as grilled steaks for 20 just doesn't cut it.  In recent years, the group has decreased to 8-12 people but still ... that's a lot of people to cook for out of doors! We have some tried and true dishes that have become standards at camping, simply because they feed a lot of people without a  lot of work and it's easy clean up.


Back to the guy-stuff catalog ... Mr. Pirate saw this battery powered rotisserie.  It was intriguing. We could potentially do a rotisserie roast for *everyone*, no muss/no fuss, and what a great change of pace for dinner!

This afternoon/evening we (Mr. Pirate & I) decided to try out the new battery rotisserie.  A 3 lb roast was obtained, seasoned and skewered onto the rotisserie.

Originally, Mr. Pirate thought he would use coals from the wood fire to cook the roast, but being unsure of how long this might be, he changed his mind and opted to use charcoal briquettes instead.

Last summer, Mr. Pirate built us a keyhole firepit in our backyard.  For this rotisserie experiment, he built a wood fire in the firepit (so we could keep warm in the chilly January late afternoon) and a charcoal fire in the keyhole portion.  As the wood fire burned down and produced some wonderful coals, we moved those wood coals to the charcoal briquette pile to help cook the roast.

As we waited the hour-and-20-minutes for the roast to cook, we enjoyed some wine that was leftover from a previous party.

No, these bottles were NOT full when we started the roast.  But they sure became empty by the time the roast was ready to eat!  :-)

During the waiting time, I used the opportunity to collect the daily eggs from our stupid chickens.

Boy, we had a bumper crop today!  Four eggs!  woo hoo!

These chickens 


and these chickens  (plus one rooster who doesn't lay eggs at all) produced those four eggs.

And let me tell you, they are really producing these days!   Those four eggs are double the production from last month!  :-) 

During the summer, they'll lay between 8-10 eggs a day but now, during winter, when there's less daylight, they just don't sit down on the job, as they should.  I keep waving a rubber chicken in front of them, with the caution that "this could be YOU" but they, like the cats, just ignore me.

Eventually, the roast was done, the chickens had gone home to roost and Mr. Pirate & I moved indoors.  The roast was wonderful and I do believe we have found an additional way to fix dinner at camping!  :-)