Sunday, December 04, 2011

Moose Knits & Crafts Etsy Store

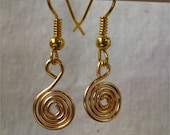
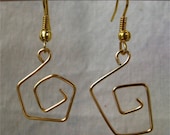
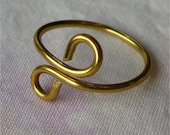
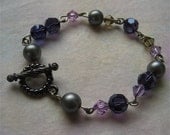
My middle daughter creates the most lovely, hand-crafted jewelry items.  She has them listed in her Etsy shop, Moose Knits & Crafts   Do check them out for your gift-giving needs!  She has ....


geometric swirl earrings


and rings


and bracelets


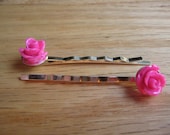
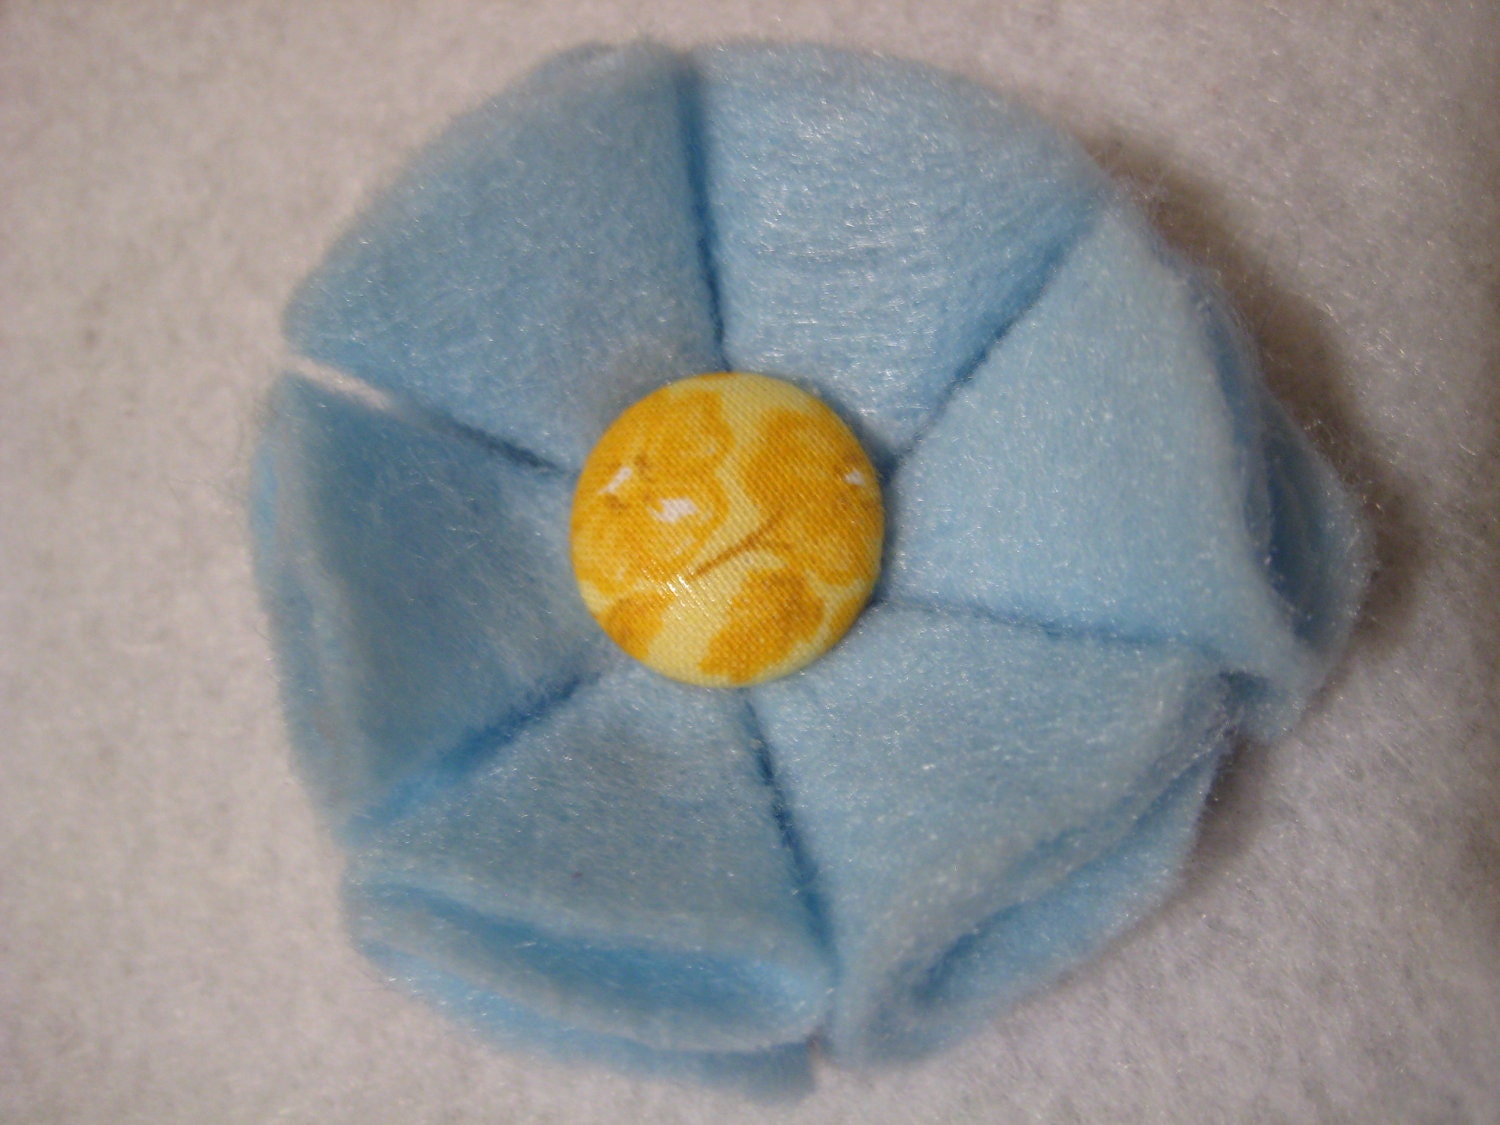
and decorative pins and bobby pins for your hair!


and other selections/colors, as well!   All very reasonably priced!  You know you want to go see them. :-)

Saturday, December 03, 2011

Tooth Fairy Pillow

One of my friends has a young son.  The son has just discovered that he has a "wiggly" tooth and is incredibly excited!

I remembered that I had a machine embroidery design for a Tooth Fairy Pillow, so I made it up for the youngster.

The design is from Teri of www.sewterific.com and can be obtained at http://www.sewterific.com/ToothFairyPillow.htm 

I used a cutaway stabilizer in the hoop, *pinned* the fleece to the stabilizer and then put thin Solvy as a topper.   Note that the fleece and the Solvy were *not* hooped ... too bulky.  I have pinned many, many, many projects to the hooped stabilizer with much success.  This certainly eliminates any hoop burn.  The hooped cutaway stabilizer worked outstandingly ... plus the design is just fantastically digitized.  All the pieces of the angel butted up against each other so perfectly .. no gaps or distortion.  I was very, very pleased with the outcome.

The appliqued rounded corner pocket that I used came from another design (source unknown).  I used sparkle tulle for the pocket so the Tooth Fairy can see the tooth.  :-)

I used a mottled fleece for the pillow (both front and back).  To make construction easier for me, I simply pinked the edges of the exposed seam allowance.  It's been my experience that a conventional pillow (one that is turned inside out so the seams are in the inside) results in a rather bulky edge because the fleece seam allowances just do NOT play nicely.

It goes off in the mail today.

Occupy Your Sewing Room: Dec 3 - 10, 2012


Occupy Sewing Room


This "Occupy" movement has taken on a life of its own and this time, it's right up my alley!

Barbara, of Cat Patches blog, has initiated an Occupy event that we ALL can participate in: Occupy Your Sewing Room from December 3 through 12, 2012. 

The demand list is simple;

  1. Leave me alone.  I'm sewing.
 To entice participation, she is also going to have a give-away on December 17 to commemorate the event.  Read about Occupy Your Sewing Room on her blog!

Tuesday, November 22, 2011

The Best Laid Plans

I had JUST announced my intentions to my quilting buddies that after the holidays, I *am* going to finish quilting all the tops that I have piled up and then I *am* going to finish the UFOs that are stacked up.  The accumulation of partially finished projects has now reached the level that is driving me to distraction.  Getting them completed will feel sooooo good!

But then ...  ::sigh::  .... I ran across the blog, "Thought and Found" and the newly started Quilt-a-Long, "Oh My Stars".  There is only one star, a sawtooth star, but the colors and arrangement of her sample are simply wonderful!  I feel myself being sucked in.  (Patti ... don't you DARE start giggling at me!)

Now, eventhough I just love, love, love her colors, they aren't what I have in my stash and/or scraps, so my quilt will look distinctly different from hers.  BUT the layout will be the same ... and that is simply visually attractive!  She did a wonderful job in the placement of the different sized stars.

So, check out Oh My Stars quilt a long .... and join the fun.  You know you want to.  :-)

Monday, November 21, 2011

It was *just* a second ....

Honest to goodness, I stepped away from my computer for JUST A SECOND. 

When I returned, THIS is what I saw.  ::sigh:: 

If you look closely at the monitor, you'll see a BUNCH of extra windows that popped up, including one that had the computer *talking* to me.  

Fortunately, exiting/cancelling/closing down the windows also got rid of the voice.

I guess I shouldn't wonder any longer how I can remove 15 lbs of cat fur from my keyboard.  What IS worthy of a question is how come the CAT never seems to become less furry??

Sunday, November 13, 2011

(2) Friendship quilts for a fundraising auction

My newly-married Dear Daughter #1's mother-in-law runs a not-for-profit day care center. Apparently they have a fund-raising auction near the end of the year (or maybe right after the New Year .. I'm not quite sure). DD#1 said that child sized quilts had been donated to the auction in previous years and would I consider making a quilt?

And so I did. :-)

I chose a Friendship Braid layout, as it is very easy to do ... mindless sewing, really ... and it would be an excellent way to reduce the size of my scrap bins. Quite a while ago (probably several years, actually), I had cut all of scraps at the time into strips, 1-1/2" and 2-1/2" wide. Why I decided on those widths, I can't quite remember, but there were a LOT of them. A Friendship Braid would use up a lot of those strips.

The first step was to sort all of my strips into color families.  I wanted the braids to be basically two colors .. one color on one side and another color on the other side.

What I did NOT realize (but should have) is that using strips of different widths causes the result braid strip to skew one way, then another, depending on how wide or narrow the strip is and what side that strip is on.

I was completely surprised .. and somewhat dismayed ... to see that the assumed vertical of my first braid strip was COMPLETELY skewed.  It wavered back and forth across the width of the strip.

Because there wasn't a true vertical line to use as a base, figuring out where the sides should be was confusing.  But, I knew (um ... from past experience) that if you deliberately continue a "flaw", it ultimately becomes a Design Feature.  LOL!  For all subsequent braid strips, I continued my blatant disregard with respect to the widths and as a result, all the strips showed the same curving vertical line.  At least I was consistent.  :-)

The sashing between the strips and the outer borders are of a beige/pink paisley design that is rather subtle.  From a distance it merely looks like a textured print.  I was pleased that it blended well with all the different colors in the braid strips.

Although the workmanship was fine, it was NOT what I had seen in my mind's eye and so I wasn't sure if the top was "good enough" to donate.  With all the colors in the top, an all-over quilting design would be best, as there was no place for a quilting design to stand out.  I used "Flirtacious" By Timeless Quilting Designs.  It's one of my favorite all-over pantographs.

I used Superior's "King Tut" on the top and their "Bottom Line" in the bobbin.  Because King Tut is a thicker thread, it sits "on top" of the quilt.  I love the variegated colors.

You really can't see it well in the photograph (nor in real life, either!) so here's a photo of the back (which is plain muslin).

Wow .. it is really *difficult* to photograph the quilting design!  My hat is off to all the people who do it so well!

Once the quilt was laundered, I was very surprised to realize that I was very pleased with the final result!  The all-over panto plus the laundering had softened the lines, minimizing the wonkiness of the braid.  The final result is a very cozy quilt indeed!

But ... I just could NOT leave well enough alone.  The fact that the braids wandered all over the strip still annoyed me.  It was fortuitous that one of my fellow quilting buddies had posted a link to a Missouri Star Quilting Company YouTube video on making Friendship Braids with a half-hexagon template.  Here was another way to make the braid, use up a pile of wider (3") strips that I had found AND have the strips turn out straight and vertical!  :-)

I thought the technique intriguing.  I didn't have a half-hexagon template, as the video shows, but I found a hexagon shape using Google Image search.  I copied the shape into my graphics editor, resized it to 6 and printed it out.  Then I glued the shape onto thin cardboard, cut out half of it .. and voila .. I had a half-hexi template.  Good enough for this use, at least. :-)

The reason I sized the hexagon to 6 inches is that I had pre-cut 3" strips.  Half of that whole hexagon would give me a 3" half-hexagon and allow me to use the pre-cut strips.  Boy, did that work out well!  Two cuts across the strip and I had my half-hexie segments!

A little math and a little tweaking showed me that I needed 42 half-hexie cuts to make a strip 60" long.  The finished width would be about 8".

Indeed, the assembly went together exceedingly quickly ... and much more consistent that the technique I had used with the first Friendship Braid quilt.  Because these braids are wider, I didn't need as many as the previous quilt top.  I also did NOT color sort my 3" pre-cut strips simply because I didn't have enough of any color to do that.  This new top is completely random in color placement.

I used a deep maroon solid for the sashing and outer borders.  Once again, I used plain muslin for the backing.  (I buy bolts of 108" muslin because I just love seamless backings.  Muslin gets softer with laundering and it's a traditional backing.  But the real reason I use muslin?  I'm cheap. :-)  I used to use quilting cottons for the backing but I can't afford that any longer.  In reality, no one really sees the back of the quilt, so it doesn't need to be decorative.  Although I have pieced backings before, I really don't care for them, as they cause their own problems when I load them on my frame.  Extra wide muslin is a perfect solution, especially when I have a discount coupon to boot!)

I needed another all-over design for the quilting.  I didn't want to do another pantograph .. my setup with my Tin Lizzie is less that user-friendly for working from the back of the machine, simply due to the constraints of where I needed to put the frame. 

I've always liked Baptist Fan.  I have a set of plexiglass circles that I use to do Baptist Fan and in short order, the quilting was done.

As with the pantograph used on the first quilt, the quilting itself isn't readily apparent.

For this quilt, I used Superior's "So Fine" in the top and their "Bottom Line" in the bobbin.

Because So Fine is a thin thread, it tends to sink into the quilt, which is great when you want to emphasize the piecing design instead of the quilting.

And finally .. a label!  I have a personalized "pirate" label that I put on all the quilts that I keep or give away as gifts.  I created the graphic in Paint Shop Pro and print it with Print Shop on an as-needed basis.

But for charity quilts, I don't want to use that specific label but do want to put "something" on it to acknowledge that I did the work.   So, using my embroidery machine, I created another label to use when I don't want to use the original pirate label. :-)

And for all you nit-pickers out there .. yes, I KNOW that the iconic pirate symbol of the skull and crossbones is called a Jolly Rogers.  But because my surname is RODGERS, I have taken poetic license with the spelling to incorporate my name.  That makes it more personal. :-)

Monday, November 07, 2011

Quoth the Raven ....


... "Nevermore".


The clever folks over at Urban Threads come up with the quirkiest machine embroidery designs.  This one, "Nevermore", caught my eye because Dear Daughter #2 is an English major and she's into off-the-wall stuff.

This design is small (approximately 3-1/2" x 6-1/2") but I had The Perfect pillow insert for it!  I had purchased a standard size pillow insert for a previous project.  Unfortunately, the previous project was a non-standard size and the standard pillow insert was slightly too long.  Not to worry ... I would simply cut off the excess.

But wait!   In looking at the leftover bit, it really was too big to throw away; surely I could use it for "something".  (That is the mantra of horders collectors.  If you could possibly use it sometime in the future, better save it so that you won't have to buy it when you need it.  However, you do need to ignore how much STUFF you are saving.)   So, I saved the cut off piece for later.

Well, "later" came sooner than I thought it would (Hooray!).  The "Nevermore" embroidery would fit nicely on that custom sized, cut off bit!

Digging through my scrap stash, I came up with a lavendar-n-white print which was just big enough for the embroidery.  However, it wasn't big enough for the small pillow insert.  Not to worry, digging through my fabric stash again, I rediscovered 2 pieces of a fabulous deep purple fabric with copper "writing" on it.  Once piece was used for borders on the embroidery design to bring it up size and the other piece was used for the backing.  Combined with the "Nevermore" quote, this ::ahem:: literary fabric would be perfect for my English major daughter.

Just to jazz it up a bit, I used some leftover gold metallic fabric (from a previous vintage ballgown I had made for Dear Daughter #2) for a narrow flange between the embroidery and border fabric and also as the piping all around the pillow.  (Yes, to be coordinated, I should have used a copper fabric, but I didn't have any and didn't want to wait until the next day to buy some.  The gold metallic looks nice anyway and will remind Dear Daughter of her ballgown.)

The stitching was done without a hitch.  I have a Janome 300e, a very basic, stand alone embroidery machine.  It doesn't have many of the bells and whistles that other machines have, but it certainly suffices for my needs and it stitches beautifully.

I like to make my pillow covers with a zipper hidden at the bottom seam.  It makes the back look nice (one single piece of fabric) and makes the pillow cover removable for laundering.  When cutting out the front & back of the pillow, you need to remember to also cut a zipper extension, so there is more than a simple seam allowance to sew the zipper to.

I remembered to cut out the zipper extension on the back.  I remembered to cut out the zipper extension on the bottom front border piece.  When I finally got the front & back sewn together and sat back to admire it .... the zipper was on the TOP of the pillow, not the bottom.

::curses::
::lots of unlady-like words::
::stamping up and down::
::temper tantrums::
::hissy fit::

I had sewn the border piece with the zipper extension to the top of the embroidery instead of the bottom.  I'd love to say that I was a complete idiot to do that but obviously some parts are missing.  :-(

Sooooooooooooooooooooo .... gritting my teeth, I disassembled the pillow: removed the zipper, separated the front from the back.  Luckily, the piping didn't need to be removed.  :-)

However, the front border piece with the zipper extension needed to be repositioned to the bottom of the embroidery piece.  If you look at the finished pillow, you'll see that the embroidery piece is really just an insert ... so to make my life easier (since I did NOT want to mess with the narrow flange fabric), I decided to remove the embroidered "insert", turn it upside down and .. voila! ... the zipper extension is now on the bottom!

The finished pillow is a very small accent size ... 7" x 14".

I love solutions.

From then, it was just a matter of re-assembling the pillow as before.  This time, there were no mishaps and the pillow was successfully completed. :-)   The next time Dear Daughter makes a personal appearance at the Ol' Homestead, she can take possession of it.

And ONE MORE THING .... take another look at the photo at the top .... see that small blue bowl of shortbread cookies?   *THOSE* are not store-bought.  THOSE were made by our Dear Daughter #3, who is the most AMAZING cook and baker.  These shortbread cookies absolutely, positively MELT in your mouth.  They are soooooooooooooooooooooo good.

Gosh, I'm glad she made them for her friends and that they are soon leaving the house.  :-)

Dear Daughter #3 has a food blog, The Adventures of an Epic Baker.  Since she typically takes her photos first and then writes the blog, the entry for the shortbread cookies might not be up yet .... but keep checking back, it'll be there eventually.  In any case, you could always peruse the other food entries she has written about ... they are ALL really, really tasty!  :-)

Tuesday, October 11, 2011

Lots of events have been going on of late .... (no pictures in this post as I am away from home and my photo inventory!) ...

The Pirate's oldest daughter became married to a wonderful man.  The ceremony was on Mt. Diablo; the reception was at the Pirate homestead.  ENORMOUS amounts of time were spent getting the place looking spiffy.  The ceremony and reception were low-key and very enjoyable.  I do believe everyone had a wonderful time.

Almost immediately after the reception, Mr. Pirate & I took off on a LONG-deferred 2 week road trip around Arizona.  I took many, many, MANY pictures (but none available at the moment) and kept a travel journal.  The pictures need to be culled and the good ones posted in the blog.  The notes from the travel journal were transcribed nightly onto the laptop that we took with us.  The original plan was to blog about the day's adventure as they happened, so you, Dear Reader, could experience the trip along with us.  Sadly, internet access was intermittent and, when available, slower than molasses in January.  It just wasn't feasible to blog en route.  Therefore, upon our return, a new set of Adventure pages will be made to document the road trip.

Eventually, the Arizona road trip ended and we did make it back home in one piece, safe and sound.  BUT ...
exactly a week-and-a-half later, we are on the road *again*!

This time ..... ::anticipatory pause:: ... I am going to MQX!    (Machine Quilters Exposition) in Portland, OR!  Mr. Pirate and I decided to make it another road trip ... a couple of days up to Portland, 4 days at MQX, and a few days returning home.  Again .. internet is spotty, so there won't be any concurrent blogs.  I am scheduled to take FOUR hands-on classes with some very big-name, experienced longarm quilters ... Ranae Haddadin, DeLoa Jones, Linda Taylor and Linda McCuean.  Each class is 4 hours long and *each* student gets to stitch at her own longarm machine.  I will be in seventh heaven and delirious with happiness!  Even with a making a doodle cloth in the classes and taking copious notes & drawings, I hope that I will be able to retain all this knowledge that is going to be stuffed in my head.

Again, I am taking pictures along the way and keeping a travel journal.  Upon our return, a much more informative blog will be written. :-)

Stay tuned!  :-)

Sunday, September 04, 2011

a very purdy egg :-)

Long time readers might remember that the Pirate family has a flock of chickens.  Two of these chickens are Ameraucanas.  Ameraucanas typically lay eggs that have pale green or pale blue shells.  (The eggs themselves are normal looking). 

The Pirate Ameraucanas have only EVER laid green shelled eggs.  (Personally, I think the blue shelled eggs are an urban myth cuz I ain't never seen one!)  The green is really much greener than this picture depicts.  This particular green shelled egg has some very lovely speckles on them; I prefer to think of them as "freckles".  :-)

Isn't this egg just plain, ol' purdy?  ;-)  

On the quilting front ... it's not.  I haven't done any quilting since the end of July and I'm definitely feeling the heebie-jeebies from the lack.  But, there is a very good reason: I've been busy sewing the wedding outfit for our oldest daughter, who's wedding will be this coming Saturday (like, a week from now!).  It's been a long haul, doing that outfit.  I am on the 5 yard line and I have firm expectations of being able to FINISH it tomorrow!  oh hooray, she said tiredly.

However, there is no rest for the wicked, for as soon as the wedding outfit is complete, I get to help Mr. Pirate start tidying up the yard.  (The reception is being held here at the Ol' Homestead.)  Tomorrow afternoon, middle Dear Daughter is arriving to help me start tidying up the public rooms in the house.  (True confession time: whenever I have company over, I only clean the "public" rooms .. living room, dining room, kitchen, bathrooms and family rooms.  Company never goes in the bedrooms nor my sewing room, so why waste time cleaning them up? :-)   )

All of this pre-wedding activity is the justification for the lack of blog entries.   After the wedding, I am simply going to collapse.  After that ... I am going to quilt!  quilt!  quilt!  :-)

Tuesday, August 23, 2011

Stats: who knew?

My blog is hosted by Blogger.  I've just been so tickled pink to do the basic blogging thing that I haven't ever taken the time to explore other options offered by Blogger. So, it was a delightful experience to discover that Blogger keeps statistics of various kinds on your blog that you can see.  Who knew that statistics options was available??  :-)

For just *today's* (8/23/11) stats, while I see I've mostly had visitors from the USA, I *also* have had visitors from Canada, Australia, United Arab Emirates, Germany, Spain, Philippines, and Chile!  Imagine that!!

And for this weeks' stats, visitors came from Canada, United Kingdom, Australia, Germany, India, Netherlands, Colombia, Spain, and France!  Wowsers!!

*ALL* *OVER* *THE* *WORLD*.   Primarily English-speaking countries don't necessarily surprise me (I'm waving to Canada, the UK, Australia) but all the other countries, where English might be spoken, but not as the primary language ...   UAE?  Europe?? South America?? Southeast Asia??   and that is just *this week*.   I am deeply grateful for all of you readers!

Thank you so much for reading my blog.  I write mainly to document for myself what I'm doing as a digital diary of sorts.  I love to share my knowledge with others and am very, very happy (and pleased!) to see that so many people from all over the world drop by to read what I'm doing.  I'm just astounded by how far blogs reach.

I know (through Google Reader) that there are many blogs written in languages other than English.  I admire all the eye-candy on those blogs without understanding the verbage.  There was one blog from the Netherlands that prompted me to click through to it and leave a comment.  I had no idea if the author spoke English or not, but figured my enthusiasm and compliments would come through (at least the smiley face, if nothing else!).  To my pleasure, the author responded to my comment in English, so I'm happy she actually understood my words.  :-)

So, to all you quilters Out There .... all around the world ... thank you for reading my blog!  Thank you for stopping by.  Thank you for having *your own blogs*!  I love, love, love reading about what everyone is doing.  While many pieces are inspirational to me, I have come to the stage in my life that I realize I can ADMIRE something and not necessarily need to REPLICATE it.  Please continue to post pictures .. *lots* of pictures!  Seeing all the eye-candy is one of the bright spots of my day!  :-)

Where has the QUILTING gone??

Since (approximately) the late 1960's (honest!), my creative life has centered around sewing and needlework.  When I was in high school, I made most of my clothing.  I took a break during college cuz schoolwork got in my way.  :-)

Once I had graduated and was gainfully employed, I started my needlework phase.  All KINDS of hand needlework and I loved it.

When my girls were born in the mid 1980's, I realized that making decorative, embellished items wasn't a good use of my time, so I resumed garment sewing ... this time for them.  When they entered junior high school and wanted to wear nothing but jeans and t-shirts, I declined to sew those items. :-)    That's when I *really* started quilting.

But for a very brief period in high school (circa early 1970's), I started to crochet.  I'm not sure if I was taught or learned by myself, but I had Grand Illusions of making a granny square afghan for my bed.  I studiously made granny square after granny square, bundling them up in piles of 10s (for easy counting).  I also made a WHOLE BUNCH of granny square centers (only).   At some point, I started to whip-stitch the squares together.  And then ... at some later point .... they all got put away.

I never *quite* forgot about them because when I moved from my parents' house to my apartment ... and then to my house ... and then when I reorganized or cleaned out my sewing room ... that project was always there.

Let's fast forward to current times  ... 2011.  I've been trying to work on finishing up UFOs (UnFinished Objects) and I finally came to grips with the fact that I really, *really*, REALLY ought to finish the granny square afghan.   I hauled out the project bag and (re)discovered that (apparently) the reason I had stopped was due to the fact that I had run out of the white yarn I was using for the final rounds.  Off to Joann's to try to find a compatible white.  I had no illusions that I would find an exact match after (gulp) 30-odd years but I hoped to find something "close".  Under the store lights, I found a compatible match. However ... and you knew this was coming, right? ... back home under natural light, I realized that my new white yarn really, *really*, REALLY wasn't suitable.  ::sigh::

Since it is MUCH easier for me to make bed-sized *quilts* rather than bed-sized afghans, I made an Executive Decision to simply leave the already sewn-together squares as they were; it would make a decent sized baby blanket.   Using the power of the internet, I found a SIMPLE picot edging and was exceedingly pleased to conquer it!

With the previously-made granny square centers, I used the new white yarn to complete the squares.  Again using the power of the internet, I learned I could use a slip stitch to join the squares together.  (The previous squares had been whip-stitched and I didn't particularly care for that technique).  More internet powers revealed a more ambitious (but still do-able for me) lacey edging.

 Voila!!  I know have two baby afghans completed!  (No grandchildren yet .. none in the foreseeable future, but that's OK.)  I will simply pack them away until the appropriate time.  Middle Dear Daughter wanted to know if I was going to donate them to the crisis nursery (where I donate my small quilts); I told her most emphatically 'no way!'.  These afghans took too much of my time to donate them!  They will be for family. :-)

But I still had a bunch of yarn leftover from the granny square project.  I started looking for EASY projects to do and found one, the Cross Stitch Afghan.

[Let me say, at this point ... end of July 2011 ... my oldest Dear Daughter finally decided on what kind of wedding outfit she wanted and asked me if I could/would make it for her in time for her early September 2011 wedding.  It isn't a complicated garment .. a corset top and an A-line skirt .. but Dear Daughter wanted elements that weren't on the pattern and then changed her mind after the base pieces were already cut out ... so I was stressing over the making of it.   I dealt with the stress of problem solving by procrastination ... and working on this new crochet interest.]

I started it with a deep maroon yarn but my sister in law pointed out that maroon was a really dark color for a baby afghan, I agreed ... and changed the focus of this particular project.  What I'll do with this, instead of making an afghan out of just one color (and in a small size, per the instructions), I'm going to make a whole BUNCH of big blocks and stitch them together like a patchwork quilt.  This crochet project has now become my current Forever Project. :-)

But .. as I was looking for companion yarns to work with the maroon, I saw these very soft balls of yarn.  On the wrapper was a diagonal shell stitch pillow that the instructions SAID was easy.  Well .. it kinda sorta was.  Middle Dear Daughter, who is a GENIUS when it comes to knitting and crocheting, helped me out when I couldn't make heads nor tails of the instructions.  I muddled through the pillow project, working on it when I came up against brick walls during the construction of the wedding outfit.

I just now finished the diagonal shell pillow ... and even with all the beginner faux pas and mistakes ... I'm rather pleased with it.

Sadly, I still have some of that very soft yarn leftover .. and need to do something with it.  :-)

On the wedding outfit front, all the problems (up until now!) have been resolved and all I need to do is finish it!  If I concentrate on my sewing, I can get everything done by this weekend .. God willing and the creek don't rise.  :-)

So what am I doing?  Blog entries!  :-)

But after the wedding??  Oh my hallelujah! .... it's gonna be QUILTING TIME!  :-)

Friday, August 19, 2011

Oh! I've entered a contest! Vote for me!

I usually don't enter contests because I have SO MANY projects on my List of Quilts To Make that I can't ever justify deviating from working on my List to work on a different, specific quilt.  However, I just happened to stumble upon the weekly contest over at the Quilting Gallery.  The theme of this current week's "Floral Quilts".

Well, by golly, I *do* have a floral quilt!  It's even quilted!  :-)  So, on a whim, I entered into the contest with Nabi Garden.  :-)  (that link will send you to *my* webpage where Nabi Garden is described in excruciating detail.  Lotsa verbage and lotsa pictures!)

Apparently the winner is determined by popular vote, so I am asking you, Dear Reader, to surf on over to the Weekly Contest.  Scroll on down the page and you'll see thumbnails of all the entries.  Below the pictures will be some check boxes.  The Rules state that you (as voter) can choose up to six quilts.  Please be sure to make sure that my Nabi Garden is one of the ones you checked!  :-)

In any case, I would deeply, deeply appreciate it if y'all would go to the contest link and VOTE FOR ME!  :-)  Although there are some absolutely wonderful quilts entered, none are as wonderful as mine. :-)  I urge you to admire but ignore them.  Vote for me!  :-)

(subliminal message: Vote for me!)

Monday, August 15, 2011

Pets on Quilts

(edited .. I forgot that Freeservers doesn't allow linking so I've edited the post to upload the same pictures from my computer.  Sorry 'bout that!)

SewCalGal burst upon the blogging scene with a big, ol' bang in February 2009 and hasn't slowed down at all!  One of the items that she continually blogs about are giveaways and contests.  Her current giveaway is connected with her Pets on Quilts Show.    Blog about your own quilts with pets on them, quilts with pet motifs,  EQ6/EQ7 designs, Quilt Art, Machine Embroidered quilts....all with a pet theme ..provide a link back to your own blog on her blog and you've entered the show!


Naturally, I needed to take a trip down memory lane to see what quilts I have that qualify!  Beware!  my goodness this turned out to be a LONG entry!

During the construction phase, most of the time, I wage a battle with our resident cats to keep them FROM sitting on my quilts.  But, cats being cats, they seem to find the SMALLEST area of fabric and then occupy it.  It's a continual, on-going battle.  Unless I'm creative, they win.  :-)

 First we have "You Can't See Me".  Little Paw, our tortoiseshell, hides face first in the Lumiere de Noel quilt I made in November 2010. 


Also in November, I was working the appliqued border for a Carpenter's Wheel quilt.  I stepped away from my work for just a minute and when I returned, there she was ... keeping it from floating away.


 (As is usual, my piecing goes faster than my quilting, so the Carpenter's Wheel is still at the flimsy stage.)


In September 2010, I made a small quilt for my niece's toddler.  Unbelievably, I gave it to her without taking a picture of the finished quilt!  Oy!  What a doofus!

The quilt was made from a pre-printed panel and appliqued blocks.  This was the first time I had tried faux trapunto and was pleased it came out looking so nicely!
In August 2010, I started working on twelve embroidered blocks of dresses from the 1950's called "Dress Me Up".  I finished the last embroidered block in April 2011 ... and it's also a WIP.  I haven't even sashed the blocks!

But, Little Paw was helping me by anchoring whatever block I was working on.


I was also working on 4-Patch and Furrows in August of 2010.

I got a 2-fer for this quilt.  Both Sneaker (our tuxedo cat) and Little Paw, in a very rare display of detente, snuggle into the quilt.
(Here's the completed 4-Patch and Furrows.  I gotta remember to make a page for it!)


In June 2010, I was working on my Equilateral Triangles.  Little Paw not only makes sure that quilts are snuggle-tested and hand-work doesn't float away but she also CLOSELY supervises the actual piecing.


In May 2010, I was working on Propeller and Little Paw made sure that the flimsy didn't slip off my sewing cabinet.


April 2010 found Little Paw providing another snuggle test to Royal Mendhi Crystals.


Another April 2010 quilt, this time a 9 Patch Pizzazz lap quilt, got the snuggle test.


Even Nabi Garden, in January 2010, was subjected to the snuggle test.


November 2009 found Star Galaxy a perfect place to hide.


Are you tired of seeing that same darn cat sitting on my projects?  LOL!!

I actually found a quilt OF a cat this time!  In January 2009, I made Cat and the Canary, using Patrick Lose's line of cat fabrics.   The gold feathers and the black cat are needleturn appliqued.

Although this is a picture of it at the flimsy stage, I actually did get it quilted .. hmm ... perhaps I ought to take a picture of the finished quilt and update the webpage!


Sometime in 2002, I found these marvelous batik'd cat squares and made a pillow from them.


In May 2001, I hosted a block swap of a pieced cat that was featured in McCall's quilting.  Although this picture is of the flimsy, I did have it quilted by a local longarmer.


And FINALLY .. ohmygoodness, I bet you thought this entry would NEVER end!

March 2001 ... here is the very first pet-themed quilt I made, Sushi Cats.   All the Flying Geese are of cat prints; the background are of cat's paw prints and the border is a marvelous, absolutely fantastic print of sushi cats!


Post Script: I actually did find at least two more quilts where our cats were inspecting them, but I have taken pity on you ... you've seen enough!  :-)


Post Post Script:  the Pets on Quilts Show ends on Friday, August 19th.  On August 20th and 21st, you can vote for your favorite blog entry at SewCalGal's blog.  I hope you will vote for ME!  :-)

Wednesday, August 10, 2011

life on the suburban homestead

We have 22 chickens.  They have a very nice, roomy chicken coop (which is actually big enough to be a child's playhouse) and a very large, fenced in chicken yard.  They have sun and shade and water in the yard .. and for a chicken, it probably pretty pleasant.  If chickens ever thought anything like that.

Some of them have figured out that they can fly and perch on top of the gate to their yard .. and thence to freedom in our one acre property.  Some of them haven't figured out the flying bit yet and so remain "ladies in bondage".  :-)

About 2 hours or so before sunset, I take pity on the ones still inside the yard and let them all out to free-range.  Sometime during this ritual, it became standard procedure for me to bring "treats" to our ladies.  Most of the time, the "treats" are pieces of bread, cut up into small chunks.  The minute .. and I mean the absolute MINUTE .. they hear/see me emerge from the house onto the deck, the ones that are out on the lawn make a beeline for me.  They do this highly amusing torpedo run and slight flapping of their wings to hurry them along.  They surround me and wait for their treats; some of them have taken to jumping up to get it from my fingers.

One of my neighbors adores the chickens.  She lives in a condo with just a pocket front and back yard.  She loves to bring her kitchen produce scraps over for the ladies to eat.  The latest offering was a head of leafy lettuce.  I cross-cut the head of lettuce up so it would be in long strips. 

It was interesting that if I offered the lettuce to the ladies, as I do the treats, they would have *nothing* of them.  BUT .. if I scattered the lettuce on the ground ... all of a sudden, the lettuce became choice morsels!


Then there's our two white crested, black Polish hens.  I think between the two of them, they almost have a brain.  Although they do have real, formal names, currently we are calling them Nutsy and Doofus.  :-)