Monday, August 15, 2011

Pets on Quilts

(edited .. I forgot that Freeservers doesn't allow linking so I've edited the post to upload the same pictures from my computer.  Sorry 'bout that!)

SewCalGal burst upon the blogging scene with a big, ol' bang in February 2009 and hasn't slowed down at all!  One of the items that she continually blogs about are giveaways and contests.  Her current giveaway is connected with her Pets on Quilts Show.    Blog about your own quilts with pets on them, quilts with pet motifs,  EQ6/EQ7 designs, Quilt Art, Machine Embroidered quilts....all with a pet theme ..provide a link back to your own blog on her blog and you've entered the show!


Naturally, I needed to take a trip down memory lane to see what quilts I have that qualify!  Beware!  my goodness this turned out to be a LONG entry!

During the construction phase, most of the time, I wage a battle with our resident cats to keep them FROM sitting on my quilts.  But, cats being cats, they seem to find the SMALLEST area of fabric and then occupy it.  It's a continual, on-going battle.  Unless I'm creative, they win.  :-)

 First we have "You Can't See Me".  Little Paw, our tortoiseshell, hides face first in the Lumiere de Noel quilt I made in November 2010. 


Also in November, I was working the appliqued border for a Carpenter's Wheel quilt.  I stepped away from my work for just a minute and when I returned, there she was ... keeping it from floating away.


 (As is usual, my piecing goes faster than my quilting, so the Carpenter's Wheel is still at the flimsy stage.)


In September 2010, I made a small quilt for my niece's toddler.  Unbelievably, I gave it to her without taking a picture of the finished quilt!  Oy!  What a doofus!

The quilt was made from a pre-printed panel and appliqued blocks.  This was the first time I had tried faux trapunto and was pleased it came out looking so nicely!
In August 2010, I started working on twelve embroidered blocks of dresses from the 1950's called "Dress Me Up".  I finished the last embroidered block in April 2011 ... and it's also a WIP.  I haven't even sashed the blocks!

But, Little Paw was helping me by anchoring whatever block I was working on.


I was also working on 4-Patch and Furrows in August of 2010.

I got a 2-fer for this quilt.  Both Sneaker (our tuxedo cat) and Little Paw, in a very rare display of detente, snuggle into the quilt.
(Here's the completed 4-Patch and Furrows.  I gotta remember to make a page for it!)


In June 2010, I was working on my Equilateral Triangles.  Little Paw not only makes sure that quilts are snuggle-tested and hand-work doesn't float away but she also CLOSELY supervises the actual piecing.


In May 2010, I was working on Propeller and Little Paw made sure that the flimsy didn't slip off my sewing cabinet.


April 2010 found Little Paw providing another snuggle test to Royal Mendhi Crystals.


Another April 2010 quilt, this time a 9 Patch Pizzazz lap quilt, got the snuggle test.


Even Nabi Garden, in January 2010, was subjected to the snuggle test.


November 2009 found Star Galaxy a perfect place to hide.


Are you tired of seeing that same darn cat sitting on my projects?  LOL!!

I actually found a quilt OF a cat this time!  In January 2009, I made Cat and the Canary, using Patrick Lose's line of cat fabrics.   The gold feathers and the black cat are needleturn appliqued.

Although this is a picture of it at the flimsy stage, I actually did get it quilted .. hmm ... perhaps I ought to take a picture of the finished quilt and update the webpage!


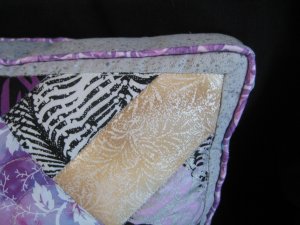
Sometime in 2002, I found these marvelous batik'd cat squares and made a pillow from them.


In May 2001, I hosted a block swap of a pieced cat that was featured in McCall's quilting.  Although this picture is of the flimsy, I did have it quilted by a local longarmer.


And FINALLY .. ohmygoodness, I bet you thought this entry would NEVER end!

March 2001 ... here is the very first pet-themed quilt I made, Sushi Cats.   All the Flying Geese are of cat prints; the background are of cat's paw prints and the border is a marvelous, absolutely fantastic print of sushi cats!


Post Script: I actually did find at least two more quilts where our cats were inspecting them, but I have taken pity on you ... you've seen enough!  :-)


Post Post Script:  the Pets on Quilts Show ends on Friday, August 19th.  On August 20th and 21st, you can vote for your favorite blog entry at SewCalGal's blog.  I hope you will vote for ME!  :-)

Wednesday, August 10, 2011

life on the suburban homestead

We have 22 chickens.  They have a very nice, roomy chicken coop (which is actually big enough to be a child's playhouse) and a very large, fenced in chicken yard.  They have sun and shade and water in the yard .. and for a chicken, it probably pretty pleasant.  If chickens ever thought anything like that.

Some of them have figured out that they can fly and perch on top of the gate to their yard .. and thence to freedom in our one acre property.  Some of them haven't figured out the flying bit yet and so remain "ladies in bondage".  :-)

About 2 hours or so before sunset, I take pity on the ones still inside the yard and let them all out to free-range.  Sometime during this ritual, it became standard procedure for me to bring "treats" to our ladies.  Most of the time, the "treats" are pieces of bread, cut up into small chunks.  The minute .. and I mean the absolute MINUTE .. they hear/see me emerge from the house onto the deck, the ones that are out on the lawn make a beeline for me.  They do this highly amusing torpedo run and slight flapping of their wings to hurry them along.  They surround me and wait for their treats; some of them have taken to jumping up to get it from my fingers.

One of my neighbors adores the chickens.  She lives in a condo with just a pocket front and back yard.  She loves to bring her kitchen produce scraps over for the ladies to eat.  The latest offering was a head of leafy lettuce.  I cross-cut the head of lettuce up so it would be in long strips. 

It was interesting that if I offered the lettuce to the ladies, as I do the treats, they would have *nothing* of them.  BUT .. if I scattered the lettuce on the ground ... all of a sudden, the lettuce became choice morsels!


Then there's our two white crested, black Polish hens.  I think between the two of them, they almost have a brain.  Although they do have real, formal names, currently we are calling them Nutsy and Doofus.  :-)

Thursday, July 28, 2011

A memory quilt

Way back in March 2011, I finished a memory quilt that I was asked to make for my Dad's lady friend.   I was a nervous wreck .. would they (the lady friend & her family) like it?  Did I do a good enough job?  I was a nervous wreck.

I was much relieved when Dad's lady friend called to say that she loved it.  I mean she LOVED IT.  Furthermore, everyone in her family was simply enthralled with the quilt.   I was tickled when she called again, a couple of weeks later, to tell me *again* how much she loved it.  :-)


I had made it with the intent of it being used as a lap quilt, but it was apparently so well received that it is now hanging in the foyer of the lady friend's home. :-)

In retrospect, I suppose that I could have simply slapped something together and since none of the people involved know how to sew, it would have looked amazing.  But I can't do stuff like that.  I want to do the best that I can under the situation.  I was pleased with how it turned out and am very gratified that they liked it also.

(Adult) children, grandchildren and great-grandchildren made memory squares to be included.  They were all *so* creatively made.  I certainly had "challenge" blocks and angst about how to assemble all these disparate pieces.  But in the end ... voila!  it was done.  :-)

Once a quilt is done, the NEXT project is always to make a webpage for it.  Time spent doing the webpage is time that I'm not sewing ... and if I want to be sewing, I begrudge the webpage time.  Most times the sewing wins and the webpage suffers. :-)

But now, I can finally say that the webpage for the memory quilt is DONE and active!  woo hoo!


For all the gory details, links and LOTS more pictures, please visit my web page for
Josephine's Memory Quilt.

Tuesday, July 26, 2011

No quilting for a while ....

... as I am working on our oldest Dear Daughter's wedding outfit.  The happy date is Sept 10th .. so I have some serious garment sewing to do.   That, of course, is taking precedence over any quilting projects!

Her outfit consists of a corset top over a separate A-line, full-length skirt.  I have experience in making corsets, as another Dear Daughter has been heavily involved in Victorian re-enactments and I have made her the Victorian outfits she's needed .. which included proper Victorian corsets! 

Here's a Victorian corset and a second Victorian corset.  Another Dear Daughter got a fancy corset as the top of her senior prom outfit. So, when I say that I can make a corset .. I can. :-)

However, oldest Dear Daughter wants shoulder straps for this corset (that don't look as though they are an add-on element) and that is a new wrinkle for me.  Since it has been about *four* years since I made the last corset, my skills aren't finely honed.  Thankfully, my corset instructor is available for consultation and hand-holding!  With her expert skills and instruction, I have successfully made a workable mock-up. 

It's time to take a deep breath and cut into the Real Fabric.  :-)   With any luck, I can have the base fabric cut and sewn by this weekend.  At that point, push will have come to shove and Dear Daughter simply *must* make a decision as to exactly which fabrics she wants as the outer fabric!

With more luck, I might even be able to get the corset *finished* by the first weekend in August.

It goes without saying that there won't be any "progress" pictures!  No sneak peaks, no teasers.  Pictures will need to wait until after the wedding. :-)  I'm sure y'all understand.  :-)

Wednesday, July 06, 2011

All Things Come to She Who Waits ...

Mode Prize Package
Back on February 8, 2011, Cara Wilson of Cara Quilts  issued a Basics Charity Challenge.  From a personal experience in her town, she asked us, her readers, to drive by a local shelter for abused women & children to find out what they need and fill the need.  There is always something and usually doesn't cost much.  If there was no local shelter, then a donation to the National Coalition Against Domestc Violence or the United Way or the Red Cross would also be sufficient.  A comment on her blog telling her what we did would give us an entry to one of the many prizes she was able to line up with her sponsors.

I was touched by her story but I didn't do what she said.  :-)  Instead, I commented about the quilts I have made and continue to make for a local crisis center for family and children up to age 11.  There were a LOT of comments published and I was only one of a couple hundred.  And I never win giveaways or contests or raffles.

So, it was with absolute ASTONISHMENT that I received an email from Cara saying that I had won the prize offered by Moda.  Oh. My. Gosh.  I was jumping up and down like a kid at Christmas!  :-)  I supplied my snailmail and eagerly awaited my prize.

And waited.

And waited.

And waited.  I waited 3 months.

::sigh::  I figured it was too good to be true.  But, just to make sure that I was giving everyone a fair shake, I emailed Cara to say that I hadn't received anything from Moda .. that I was sure it wasn't her fault but nevertheless, I was disappointed.  She emailed me *right back* saying that absolutely I had won the prize and she would follow up with Moda.

Fully one month after that, a big box from "United Notions" arrived on my front porch.  I was really puzzled because I hadn't ordered anything quilty online or via a catalogue.  But once I opened it, I realized it was from Moda!  Oh my goodness .. there was my prize!!

I got a FQ bundle of their 'Ready Set Snow" line, a roll of Luna Soy Batting (a queen sized!) and a Sewline mechanical pencil!  Wowsers!  :-)

The fat quarter bundle was very, *very*, VERY impressive ... there were TWENTY EIGHT fat quarters!  All of them soooo nicely coordinated!   There were ....
tone-on-tone stripes
tone-on-tone swirls


Christmas trees on different colored backgrounds
snowflakes on white


squares in squares
swirls on white


stripes on white
bias plaid on white


dots on white
  My mind is awhirl with ideas!  I have never, ever had a coordinated collection of fat quarters like this before and I am simply overwhelmed with the possibilities!

The Luna Soy batting ... *especially* in the queen size ... is very, very welcome!  I have a quilt top all lined up for it!

I've used the Sewline mechanical pencil before and truly loved the way the lead was soft enough to leave a crisp line on the fabric but firm enough not to crumble.  It can be removed with one of their erasers or wiping with a damp cloth or being laundered.  I am very happy to have one!

Thank you, Cara, issuing your challenge in the first place.  I hope that your readers were able to help their local charities.  And I thank you and Moda VERY MUCH for my prize package!

I'm just grinning like a fool.  :-)

Monday, July 04, 2011

Happy Birthday, USA!

Here is a very favorite quilt of mine.


Back in 2001, I "met" quilt designer Marj Rhine of Quilt Designs NW on the internet and occasionally she asks for people to beta-sew her designs before she makes them commercially available. This is the 2nd quilt I've beta-tested for her. She calls it 'Stars & Stripes Forever'; it comes as a wall-hanging and twin sized.

Since I didn't want another wall hanging right now, I decided to make the twin size version. I LOVE, LOVE, LOVE her layout! When you look at the photo, you'll see it's a bunch of Lemoyne stars. Normally, one makes this block with set-in squares and triangles. An alternative method is to use half-square triangles to avoid potential set-in problems. I'll admit that I'm a snob in this area, in that I like the set-in squares, etc because it demonstrates that I can do it. But for this specific layout, to get the zig-zags, you *need* the HST to accomplish this. And ya know? I like it! :-)


I decided that I was going to use fabric from my stash to make the twin size quilt and mostly I achieved this goal. The reds were from a wall hanging made about 6 years previously. They are reds with different gold metallic designs. One white is a homespun-sorta weave, i.e. looser than the cotton, but I liked it anyway. Unfortunately, I didn't have enough to do all the white zig-zags in this fabric, so I bought another white that reads the same from a distance. The blues were a recent addition to my stash, not specifically bought for this project .. however, I discovered that I was going to run short of the dark blue (which was also going to be used for the outer border), so a quick trip to the fabric store for additional supplies was in order! Fortunately, it was still in stock.

The result is that the red zig-zags are of different design reds; the white zig-zags are of different design whites, but overall, it reads as a simple red/white zig-zag.

Because I loved this quilt so much, I decided to indulge myself and have it quilted by a local longarm quilter, Janna Bailey of The Quilting Company. At that time, I had no idea of what sorts of thread a longarm quilter preferred to use and I wanted a glittery thread for this quilt. I brought over spools of the glittery thread and asked if she could use it. I'm not sure of Janna was just being accommodating or thought it would work fine but ... when I picked the finished quilt up, she mentioned that it had been a very difficult thread to work with. I had no idea ... and can only hope that *she* didn't either ... but now we both know something new!

At the time this quilt was made, I was in the habit of using a compatible quilting cotton for the backings. For this quilt, I used a fantastic red-white-blue starburst fabric. I don't use quilting cottons for backings any longer; the cost of fabric has become so high, I can't justify the expense for an area that just isn't going to be seen. (I generally use 110" wide muslin now).

I'm pleased with it and even after all these years, it's still one of my favorites.

Saturday, June 25, 2011

Keep It Zipped! (or What's Behind the Zipper?)

Ever have a crazy idea and create a quilt from it?   Did you ever have an inside joke with someone and create a quilt incorporating the concept?

Well ... I have and I just did!

Mr. Pirate (that long-suffering, solitary male soul in a 4 female household) has always teased me that my quilts are "defective".  He points to sleeping bags as being a "proper" quilt because they have a ZIPPER all the way around.  My quilts do not have zippers and are therefore "defective".

After years of letting the idea percolate in my imagination, I finally was able to implement my one-upmanship idea.  I found a quilt pattern, "Rolling Pin" by Me & My Sisters that was ideal for the inclusion of zippers.


I had a "surprise" to hide behind the zippers.


 And I even  had a machine embroidery design OF a zipper!

The entire construction and quilting of this masterpiece was done entirely under the nose and behind the back of Mr. Pirate.  He never had a clue.  :-)

I hope I've teased you enough so that you'll want to read the entire backstory of how this quilt came to be made!


For all the gory details, links and more pictures, please visit my web page for the Keep It Zipped! quilt.

Thursday, June 23, 2011

Serendipty wall-hanging from a Lone Star border block

Way back in October 2000, I took a Lone Star class from the fabulous, nationally known author and instructor, Laura Nownes.  Turns out she lives locally.  Who woulda thunk it?  :-)

The outer border of her Lone Star is made up of Drunkard's Path blocks ... 3-inch blocks in hot pink and vibrant green.  While many students used scissors to cut out the small Drunkard's Path pieces, I was able to zip-zip-zip through it by using the small 28mm rotary cutter with my plastic templates. The cut-out leftovers were so perfectly formed that I determined to do something ..anything .. with them. At the end of class, I sat at my table and played with the cut-out pieces, moving them around to different configurations. Laura must have noticed and been curious because she walked over to where I was in the corner to watch me play. I explained that the pieces were cut so nicely that I just couldn't throw them away. She chuckled and said that she could actually see the wheels turning in my head!


At home, during the intervening week prior to the next session, I finalized the design and constructed a very simple design with raw edge applique by machine that resulted in a long, narrow wall-hanging. I was actually quite pleased with it.

I backed it with some fabric that I had garnered from my mother's stash .. it had the same vibrant colors as the front, although it was most definitely a 1960's design!

As an aside, my older brother came to visit and admired the wall-hanging. This was truly astounding, since if an item isn't cars or guns or trains, my brother doesn't really pay attention. When I mentioned that the back of the wall-hanging was of our Mom's fabric, he was much intrigued. While he was engrossed in conversation with Mr. Pirate, I quickly put a hanging sleeve on it, as well as one of my nifty pirate labels and gave it to him right then.

He *was* surprised ... but not as much as I was when we visited his house ... he had turned the wall-hanging so that the backing .. our Mom's fabric .. was showing! I was really puzzled and asked him why .. he said that the label was so neat, he thought that was the side that was suppposed to show!!!   ::thunk head on wall::  :-)

Monday, June 13, 2011

companion throw pillow to the Oz Jelly Roll top

I had some leftover pieced corner pieces from the Oz Jelly Roll top.  They were such cute triangle pieces and of such a good size that I couldn't quite throw them away.  So, I combined them with leftover pieces of the other fabric used in the top and made a box throw pillow!


In fact, I had *two* sets of leftover pieced corner pieces and was able to construct two different blocks.  Instead of making two throw pillows, I decided to make one reversible pillow.


 However, the first set of corner pieces resulted in a block that was just >thismuchtoosmall< for the 14" pillow insert I had.  So, I added a very narrow outer border to bring it up to size.  I must admit, it does look at bit odd, being that narrow and all at the perimeter, but it did the job.
 
For the second set of corner pieces, I just made the outer border oversized and trimmed it to size.


I put piping around each edge of the boxing strip and put a zipper in the boxing strip so the cover could be removed for laundering.  HOWEVER (and why is there *always* a 'however'?), I miscalculated or mismeasured or mis-something because the zippered opening is a tad too small to easily put the insert inside the cover.  ::sigh::  I got it in, but hope it NEVER EVER has to be laundered!


For the quilting, I did feathers!  I am enamored of feathers!  After learning how to do Sally Terry's "Hooked on Feathers" and then seeing how Karen McTavish does her Victorian feathers, I now know how to do tradtional looking feathers instead of sausage looking feathers.  :-)  I am so pleased and find myself wanting to do feathers everywhere!  I haven't quite ventured out into the freeform, swirly spine, meandering feathers yet ... but eventually I'll get there. :-)


The really neat thing about pillows is they are, in essense, mini-quilts.  They are small and easily finished.  It sure gives me a nice sense of accomplishment to see (finally!) a finished quilted project instead of another top hanging up, waiting to be quilted!

Friday, June 10, 2011

Needleturn Applique on water soluble stabilizer

Reader Joan asked what the heck I was doing with the double effort of needleturn applique on water soluble stabilizer.  Of course, she asked *so much more* nicely.  :-)

So, here's a more wordy explanation.  I'm going to be using several different examples here to show what I'm talking about.  One example is the flowers I did for my Moondance (designed by Beth Ferrier), one example is a single petal I did just to illustrate the steps and the last example is my Oz Jelly Roll top (which you can also see in the previous blog entry).

*Normal* people applique directly onto the base fabric.  I have only recently become a fan of applique so my self-confidence is not at a high level.  What if I don't put the applique in the right place?  I know me .. I won't particularly want to remove the applique stitches and re-do them.

I thought of doing this water soluble stabilizer technique whilst I was working on a large pieced quilt that had lots and lots and lots and lots (ad naseum) appliqued flowers scattered all over the pieced background (Moondance by Beth Ferrier).  I was absolutely *petrified* that I would put the "wrong" color flower in a particular spot. Since I was using a LOT of different colored fabrics for the flowers, I had no way of knowing what color combination I would be using in the future and it just could be that the flower I would make 1 hour from now would be more perfect for this spot where I just stitched a different flower!   I wanted to be able to have ALL of my appliqued flowers available at the same time so I could then stand back and place each flower where it was best suited.

How to do this?  Well ... I needed the flowers to be free-standing and fully stitched together.  The water soluble stabilizer was my solution.  Yes, in a way, I *am* kinda/sorta stitching the flower twice ... but from different point of view, this is just another way to prep the edges.  (I absolutely, positively detest, detest, detest all the picky spray starch prep ... freezer paper templates ... other finicky methods.  They drove me *crazy*.)

Here's the water soluble stabilizer.  This specific one is Floriani's Wet-n-Gone.  It's a fibrous stabilizer, looks like lightweight non-woven interfacing and handles like fabric.  There are competitors with equivalent products.

Beside it is my scrap of applique fabric with the *FINISHED* edge marked in with a chalk pencil.  (Use whatever marking method you like best.  Sometimes I use a plain lead pencil.  Sometimes a disappearing marker.  Sometimes a Sewline pencil.)

I then trim the applique fabric closely .. about 1-/8" - 1/4" away from the marked line.  This is the seam allowance that I am going to be sweeping under with my needle as the needleturn part.


What I've done here is needleturn the edge under, as marked by the chalk line. 

I'm NOT doing an applique stitch at this point ... I am *basting* the turned under edge down with contrasting thread, which will be removed later. 

While I do try to get a nice smooth curved edge, where appropriate, I'm not *overly* concerned about it because I know that when I do the real applique stitch, I can finesse the curves properly.


Then I trim the water soluble stabilizer.

(I couldn't stand that point in the top curved area.  It look HORRID.  I was embarrassed to show it to you.  :-)  So, I corrected it for this picture. :-)  )


At this point, you have a choice: you can use the prepped piece this way and applique directly through the water soluble stabilizer  OR soak the piece in hot water to dissolve the stabilizer so it won't be in the way.  Remember, the edges have been basted down so they won't be popping back up. 

For this example, I chose to soak the piece.  This is what the back of the piece looks like after the stabilizer has been soaked and dissolved away ... voila .. it's all gone YET the edges are still secured!


And when this piece is actually appliqued in place, here is what it looks like.


BUT .. you could applique right through the stabilizer, which I did for the Oz Jelly Roll top.

Why leave the stabilizer in place?  Oh, because I was just being lazy!  :-)

When the quilt is laundered for the first time, all that stabilizer will dissolve away, leaving a lovely applique.


You see, if you want to dissolve the stabilizer, you soak the piece in hot water .. completely submerge it until it's all gone.  It doesn't take very long .. 3 minutes?  5 minutes?  something like that.

Then you have a wet, soggy applique piece.  That means you need to dry it before you use it.  You can air dry it on a cookie cooling rack, use your hand-held hair dryer or blot it & use your iron.

These are my Moondance flowers.  You can see that there are several layers of fabric for each flower. 

Where there was fabric-to-fabric, I did a real applique stitch to stitch the fabrics to each other.  BUT where there was fabric-to-stabilizer (i.e. along the outer perimeter), I simply turned under the edges and basted.  Once the stabilizer was dissolved, I had the most beautiful, free-standing flowers that I could then place whereever I wanted on the top.

In the end, I *am* doing double-duty .. one stitching to baste the piece to the stabilizer (and/or create the entire applique piece) and the final stitching which appliques the piece to the base fabric.  The basting part is simply a different way of prepping the edges and is less tedious for *me* than other methods.

Oh, and the Moondance top?  yes, I did eventually get it completed in August 2010!  woo hoo!  It's still waiting to be quilted .. I really ought to think more about doing that. :-)

Thursday, June 09, 2011

Oz Jelly Roll *top* finished

Oh yes, indeedy ... I have finished the Oz Jelly Roll top.  Just the top, mind you; it still needs to be quilted.  But now that this is done, I can return to the ever patient Jane Austen quilt. :-)

At first, I wasn't sure that the appliqued vines were going to work with the center part, but now that I've been working on it for a while, it's grown on me.

Because I had showed DD#2 Eleanor Burn's book "Magic Vine Quilt", she picked out some of those flowers to use on the vine.  I was shown a method for needleturn applique that works for me and now I am actually a *fan* ::gasp!:: of applique.  However, when I have a lot of individual items that need to be scattered all over, I don't like to applique them in place, for fear that where I have placed that item might not be the optimum spot.

To ensure that I can scatter and position stand-alone appliques "properly", I stole an item from my machine embroidery supplies ... water soluble stabilizer!  This particular stabilizer is a fibrous sort (Floriani's Wet-n-Gone) that looks very much like a light weight non-woven interfacing but it absolutely dissolves in water. 

For the first few flowers, I did my needleturn onto the water soluble stabilizer.  When the applique is actually stitching onto the base fabric and the quilt is laundered, the stabilizer will dissolve and all that will be left is my applique ... looking as though I had stitched it there originally. :-)   But when I pinned those flowers onto the Oz Jelly Roll top, the scale was *much too big*.  ::sigh::  These flowers won't be used here but will be repurposed in another project.

In this picture, you can see the water soluble stabilizer behind the flowers and my basting stitches that are holding the turned-under edge in place.  The basting stitches are removed when the flower is appliqued in place.

I needed smaller flowers.  I could have reduced the flower patterns but I wasn't too enthralled with the idea of doing them again on a smaller scale.  Then, I had a Light Bulb Moment™!  I could *cheat*!  Oh happy day!  :-)


In a  Broderie Perse sort of way, I fussy cut flowers from fabrics in my stash.  I could have some fabulous looking flowers with minimal effort! 

It also occurred to me that since many of the fussy cut flowers had regular edges/shapes, I could actually machine sew the right side of the flower to the stabilizer, slit the stabilizer and turn the flower right side out.  This would leave a faced edge for me to applique.  Since the stabilizer would dissolve in the wash, there wouldn't even be any extra bulk at the edge!  This turned out to be a very easy thing to do. 

The picture of the butterfly and pink rose (Mary Englbreit!) are examples of this.  Note: the poor little butterfly had his head cut off, so I'll probably hand embroider it back on. :-)

Other flowers had irregular edges or odd shapes that did not lend themselves nicely to being turned out.  For these flowers, I used my original technique of needleturning the fabric onto the stabilizer

You can see this in the red flower and the vertical orange flower stalk.


The pointy things at the edge of the sides are actually Prairie Points.  The blocks of this pattern have angular corners and I carried the shape into the borders.  

The purple/black point is part of the block itself. 

The gold point is part of the inner border and is pieced.  OMG .. that was pure torture!  To get the lines of the gold triangle to line up (more or less) exactly with the gold segments of the block was HORRIBLE. 

I had originally intended to piece the gray triangle also but the experience with the gold one had me change my mind completely.  I then realized .. duh ... that I could achieve the same effect with Prairie Points!  Geez, I wish I would have had that Brilliant Idea before I pieced the gold triangles!  Gold Prairie Points would have been *so* much easier and would have looked the same. 

The purple floral Prairie Point at the outer (left) edge will actually extend beyond the binding when the quilt is finished, is is shown.  Right now, I have it pinned that way.  :-)


I think I hear the Jane Austen quilt whispering to me ... "come back!  come back!"  :-)