

Last time, Dear Reader, you might remember that I had documented that I had finished *all* 60 flower units for my hexagon quilt. My flower units consist of a single ring flower hexagon plus a 5-hexagon "path" stitched to the top of the flower.
I was so proud of myself.
I was ready to advance to the next step in the process, which is to layout all the flower units so that I can *try* to distribute the colors in a pleasing manner. ::cough:: ::cough:: What I was trying to avoid was concentrations of any one color or dark colors or light spots.
It has enough length horizontally, but not quite enough height vertically. The excess vertical amount of the sheet gets stretched out onto the floor. Unfortunately, when I have a quilt top this big, I don't have quite enough space to back away from it to be able to take a picture without a whole lot of furniture being in the way .. which is why you see my brown sewing cabinet at the bottom of the picture and a corner of my sewing table on the right edge.
But ... it'll do, since I don't have anything else. I began by just pinning the flower units up in staggered rows, not paying attention to what colors they were. Once I had everything pinned up, I sat back and began to stare. Where were the hot spots? Where were the dark color concentrations? Where were the areas that had too much of one color? Flower units were unpinned, repositioned, and repinned.
However, there was a SLIGHT problem. I had such a great time hand-stitching the green path units to the flower units that I wasn't paying attention to my layout (from EQ). I actually didn't NEED to sew a path unit to every flower unit. In fact, I really needed some flower units NOT to have a path. And I also needed some path units without a flower.

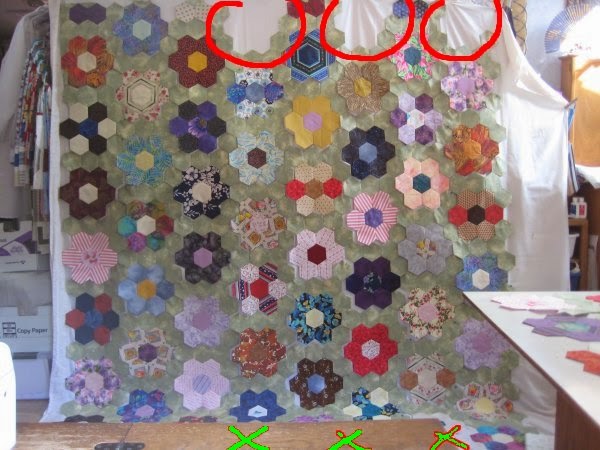
See the flower units circled in red? Well, once separated, they went at the top of the quilt, where the corresponding red circles are on the first picture. See the path units circled in green? Those pieces were needed at the bottom of the quilt (which you can't really see because my sewing cabinet is in the way) but I marked the spots with green X's.
Once I got that annoyance rectified, I once more sat back and enjoyed the view. Except ... geez, Louise ... there are some gaps along the edge where I need some single green hexagons. AAARRRGGHHH! Fortunately, I have some extra.
And that is what happens when you don't really pay attention to the layout.
I have now, very carefully, made piles of all the flower units in a column. I have 8 columns, so I now have 8 piles, each numbered for future reference. My hand-stitching is now devoted to sewing all the flower units of a column together, so eventually I will have eight column of flower units separated by their green paths.
After that? Why sew all the columns together in order to have (most of ) the top! I'm probably going to put a border around it but exactly what kind of border or how wide, I haven't decided yet.

No comments:
Post a Comment