Saturday, June 29, 2013

Status Report: what's been going on


I've been working on a bunch of projects lately.


Donation Quilts to Moore, OK
1. The Pinwheel top I finished this past May finally got quilted by mid-June (previously blogged about here).  Since this was from scrap and donated fabric, I had ear-marked it for a donation quilt.  As a matter of fact, I had been stockpiling a LOT of quilts that had more-or-less recently been quilted for the local charity I like to support.  The Pinwheel quilt was going to join that bunch.

Then the tornado hit Moore, OK.  The devastation left behind was simply unimaginable.  A quilt guild local to that area of Oklahoma put out a call for finished quilts .. not blocks, not UFOs, not anything that need to be assembled or finished.  Well, that big, ol' box of finished quilts that was sitting in the corner of my dining room certainly fit that bill.  The quilts going to my local crisis center aren't specifically "necessary".  Every child who leaves the crisis nursery is allowed to take a blanket or quilt or afghan with him/her and that is where my quilts fit in.

But *Moore, OK* .. well, THEY had a real need.  I bundled up all 12 quilts that I had stockpiled and mailed them off to Moore, OK.  I hope they are able to provide some comfort.


California Poppies needleturn throw pillow
2. I'm continuing to work on my California Poppies needleturn applique project.  I've now (finally!) completed all the background stems and leaves.  The next step is to trace all the various petal pieces onto their appropriate color fabrics and start stitching them.  (I've drawn two in so you can see where they fit in).  I really want to get this particular project done .. or at least the applique part .. because I already have my next Forever Project [alt-0153] lined up.  I'm eager to start it but I *know* that if I begin it now, without the California Poppies being done, I'll probably never finish the Poppies.  Sooooo .. nose to the grindstone and get the needleturn Poppies stitched!


Quilts for siblings:  
for the older brother. This past May, I made a baby Rubber Ducky quilt for a new member of the extended Pirate family.  The family has 2 older children.  I was thinking that they might get their noses out of joint because the new baby is getting ALL the stuff and they're getting a big goose egg.

So, with the permission of the Mom, the two kids told me their favorite colors and interests.   I finished the older boy's quilt just last week .. but haven't made the web page for it yet.  He told me his favorite color was pink and that he liked the San Francisco 49er's and San Francisco Giants.  I was deliriously happy when I found fabrics that coordinated AND fit his requirements!  
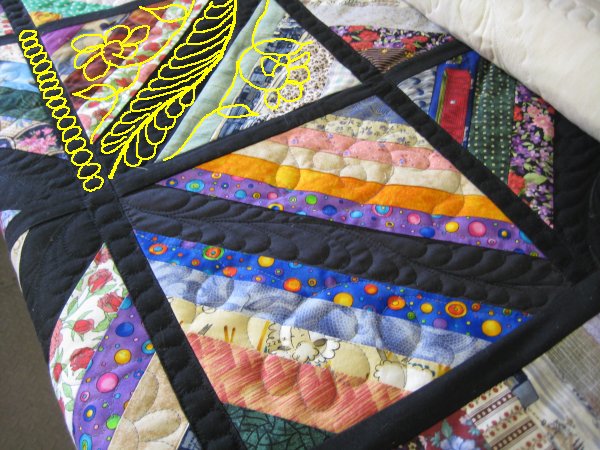
You'll have to be satisfied with this single picture for now. 


for the older sister
4. Having finished the boy's quilt, I then started on the  girl's quilt.  I had an inspiration picture as a basis and am rapidly approaching the completion of the top.

As I now see the vine up on the design wall, I think I should have curved the leftside vine with the bright turquoise flower upwards more.  ::sigh::   It's not getting moved because it's already been stitched down by machine ... very small stitches.  Ah, well .. such is life.

I figure I'll get the top finished tomorrow, load it onto Lizzie and start the quilting.  As of right now, I haven't a clue what the quilting is going to be and that is of some concern.  I know that, for me, I need to have a quilting plan in place before I ever load up a quilt.  So maybe the quilting won't get started just yet.  :-)


Even though these two quilts are for family members, I feel safe in talking about them here because I know neither the kids nor the parents read my blog.  :-)


Saturday, June 15, 2013

A Pinwheel Quilt


Yes, I actually HAVE done some quilting lately!  :-)

I was recently shown a new-to-me technique for making pinwheel blocks, which makes (4) half-square triangle blocks simultaneously from two large rectangles, instead of the normal way I make them, which is two at a time from two squares.  A small difference but it's nice to learn a new method.

I made enough pinwheel blocks to make a small quilt and eventually got the top quilted.  I don't know why I dither so much about the actual quilting process; I'm always so pleased when it's done!  :-)

The webpage for this quilt contains lots more pictures, quite a BIT more verbage :-)  and a link to a video (not by me) that shows the technique.

That picture is just a teaser! For all the gory details, links and more pictures, please visit my web page for the Pinwheel quilt.


Wednesday, June 12, 2013

(NQR) Genealogy - clarification of a surname


I've long been interested in my family history.  When I became married to Mr. Pirate, I became interested in HIS family history also.

I recently joined a local genealogical  society and one lecture I attended was given by the director of the big LDS Library, which is in a nearby city.  The talk was on how to effectively use the new, updated LDS website for searching.  He mentioned his own researching escapades and, almost as a throw-away line, he mentioned that because one of his lines was Portuguese, he has become an expert on Portuguese research, especially in the Azores.

Oh my .. did my ears perk up at that!  When the meeting was over, I introduced myself to him and asked if I could make an appointment to meet with him to learn how he did his Portuguese research.  He was exceedingly gracious and an appointment was set up.

I had (3) lines to research: two on Mr Pirate's paternal side and my own paternal line.  We actually struck out on all three lines because I don't have a whole lot of information to go on.  The one line for Mr. Pirate that I had the most information (birth year, town and island) resulted in a cruel and bitter defeat:  although the island & town DID have records online, their earliest started in 1844.  My guy's birth year was 1841.   ::cue sounds of disappointment::

When we were poking around on the other line for Mr. Pirate, I mentioned that we shouldn't be looking for the Rodgers surname because in 1915, my guy changed his name.  I brought a copy of the affidavit attesting to that and showed it to the director.

The affidavit said, ".... on November 17, 1915, Manuel Pereirada Rozas also written and known as Manuel P Rodgers ... "

My mentor took one look at that and immediately said that "Pereirada" is NOT, most emphatically NOT, a name.    (Parenthetically, I've asked one of my Portuguese friends about "Pereirada" and she said that she wasn't aware of a name like that.)

I kinda looked at him and said, well .. this is what I have  (thinking .. what, are you dumb or something?  That's his name *right there*.  It says so!).  But I didn't say that out loud; it would have been rude, ya know.

He continued on, saying, it looked to *him* that the spacing was wrong ... that the person writing down the information wasn't hearing it correctly and so typed it incorrectly.   He was sure the name was really .... Manuel Pereira  da Rozas.    !!!!!!!  Oh. My. Gosh.  That makes SO MUCH SENSE.

Pretend you're Manuel.  You have a Portuguese accent.  You might be fluent in English because you've been in this country for decades, but you still have that accent.  Now, say your name.  Manuel Pereira da Rozas.  Slur the Pereira and da together .. what does it sound like?  Pereirada.  Bingo.

So, the family name, way back when, wasn't simply Rozas .. but  da Rozas.    Not that it makes any huge difference to my research, but we now know the family's true surname.   That alone was worth the trip to the LDS libary.   I tell ya, I was one happy camper!


I've also been doing some very cursory research into the pronunciation of Portuguese names.   It sure isn't like Spanish, I tell ya.  For example .. Manuel.   In Spanish, it's "man-well".  Not so in Portuguese.  Portuguese words break out EVERY vowel into its own syllable.  In fact, "Manuel" in Portugese is actually "Manoel" and is pronounced "man-oo-el", close to Spanish but not the same.  It's extremely difficult for me to avoid a Spanish interpretation of the names.  :-)


I've been so jazzed about this small insight that I felt compelled to let the Entire World know.  :-)

I'll get back to quilting in a bit.  :-)


Monday, May 06, 2013

have you watched the Great British Sewing Bee?


I just finished watching all (4) 1-hour episodes.  It was *wonderful* ... precisely everything that I had originally hoped that "Project Runway" would be.

Let me back up just a bit.  When Project Runway first aired, I was eager with anticipatory excitement!  Here we would be able to see how designers actually designed!  How they came created their outfits; what obstacles they came up against and how they overcame them; what small but important items make a creation special instead of off the rack.

How I was disappointed.  Instead of a high-brow how-to show, what I saw was a bunch of drama queens, contention, arguing, back-biting and silly, silly challenges.  Stupid stuff.  Obviously, I am in the minority, as Project Runway is in its 11th season.  Enough people are watching it to encourage the advertisers to continue their support.  But then, it seems a lot of people like those atrocious reality shows too.

So, when I first saw that PBS was putting on a Great British Sewing Bee .. a national competition for the Best Amateur Sew in Great Britain, I was very skeptical.  Since my PBS station didn't carry it, the only way I could watch it was on YouTube.


Well, I really do NOT like to watch lengthy videos on my computer.  It's just one of my quirks;  I didn't save any of the URLs and I promptly forgot about it.

Until one of my quilting friends blogged about it.  Now, I truly respect her opinion when it comes to quilting matters, so I was willing to risk watching at least PART of the first video.  After all, no one was forcing me to watch the entire thing. :-)

Much to my utter surprise and immense delight, this show is EXACTLY what I was hoping that Project Runway was going to be.  The Great British Sewing Bee starts at the point where we have 8 semi-finalists.  We don't go through all the auditions.  Each episode has 2-3 challenges, which are all exceedingly spot-on when you want to see how well a sewer can *SEW*. 

One challenge is usually how well can they follow a printed pattern.  The patterns aren't anything unusual, despite what the hostess voice over says.  :-)   One pattern was to make a man's shirt (simplified because it didn't have cuffs and plackets). One pattern was to make a man's trousers. One pattern was to make a little girl's sundress.  These are items that any sewer might make as a matter of course.  (That being said, I've never made men's trousers, but I have no doubt that I could follow the directions, if they were half-way decent.)

Another challenge was to design and make something of their own choosing.  They could use a commercial pattern or draft something themselves.  These challenges usually involved fitting the garment onto a live model so that the sewers needed to know how to *alter* the pattern to fit body issues (something that I've never really mastered).

All the challenges have a time limit.  Since I normally don't sew under extreme time limits, I'm not sure if I could have finished any of these challenges myself.  But to embellish a blank purse with handwork only in any way you wanted in only 1 hour AND be the best??  I dunno.  It might take me that long just to THINK  of what to do!

There are 2 judges: a gentleman from a Savile Row tailor and a lady who has spent a lifetime teaching couture sewing.  They were both very down to earth people.  The hostess was an enthusiastic (in a subdued British sort of way!) lady who was the cheerleader for the group.  :-)

The program focuses on each of the contestants in turn, asking questions.  Everyone is very focused on what *they* are doing,   No one was bad-mouthing anyone else.  It was so, so refreshing.

As for the judging .. oh my!  THIS is what Project Runway should have been about.  Both of the judges talked specifically about each sewer's project, what they were looking for, the good points about the projects while being very diplomatic about the deficiencies.  And yes, many of the projects had quite a few major flaws.  (If I was trying to make a formal gown in 8 hours, I might have some major flaws too.)  It was *wonderful* to hear exactly what specific things made a project standout from the others, as well as what flaws made it classically "home made" in the worst sense.

Each episode eliminated 1 or 2 contestants until there were 3 finalists left.

After I watched the first hour-long episode, I promptly watch the other 3, one right after the other.  They were all Very Very Good.  And honestly .... how can you NOT enjoy those wonderful English (and one Scots) accents??  :-)

So, without any more blathering on my part, here are the YouTube URLs for you to watch each full length episode.  I promise .. if you enjoy sewing garments, you will thoroughly enjoy these 4 shows.


#4: http://www.youtube.com/watch?v=h5KcpvBLELo


Sunday, May 05, 2013

Hawaiin Applique: top *now* finished; new project started


The handwork for one applique project is done; another one is started.

I like to always have a handwork project in-progress.  It's my Grab-n-Go project, continually ready to be snatched as I head for the car.  If I know I'm going to have substantial downtime someplace, I like to be able to productively occupy my time.

It was only this past January that I started the needleturn applique for Nancy Lee Chong's "You are in our hearts" Hawaiian applique.  The project, as determined by the pattern, is about 40" square.  I finished *that* part of it last February.  In terms of Forever Projects ™, that's a pretty pathetic one.

I also don't particularly care for small square quilts; they aren't useful for me.  So, instead of leaving this pattern as-is, I decided to put a top & bottom border on it.  Fortunately, I had extra background fabric and extra applique fabric.  Using the Hawaiian applique design as the base, I made my own linear border.  The picture to the left is the top only, hence the wrinkles.

*NOW*, I'm pleased with the final, overall dimensions.  At 42" x 63", it's a more useful size.  It'll decrease slightly once it's quilted and bound, but it will be nominal.  The quilting part will need to wait it's turn behind all the other previous projects.


Because I knew that the Hawaiian Applique was coming on an end, I started the prep work for my next handwork project.  This one is called "California Poppies", which are one of my very favorite wild flowers.  I purchased the pattern and fabric at a local quilt show recently.  The pattern is designed by Bobbie Y Jarrett of Shingle Springs, CA and it was she, who was manning the vendor booth at the show.  When I realized this was *her* design, I asked her autograph the pattern for me; she graciously signed her name.  I'm such a fan girl. :-)

This project was originally designed as the center medallion of the 2012 Opportunity quilt made by the Gold Bug Quilters of El Dorado county.  Unfortunately, I can't seem to find a picture of that Opportunity quilt. 

But I do love this center medallion!  At a finished 18" square, it will make a wonderful throw pillow.  I'm thinking I might do "something" in the border area; I'm not sure at this point.  I'll need to wait until the applique is done to see what it says to me.

I did have one nitpick about the kitted fabric: the green batik for the background was perfect; the step-value oranges for the poppies were perfect.  But for the stems and leaves, the fabric was a bright BLUE.   Yes, that's right: blue.  It was incredibly jarring.  Apparently, this coordinated with the other blocks in the Opportunity quilt.  It may have looked fine in that setting, but as a stand-alone?  No way.  I substituted my own gray-green fabrics from my stash.

You can see that I have front-basted the stems and leaves onto the batik background.  Since the orange poppy petals will overlap the green parts, the stems and leaves need to be done FIRST.

As far as my (infamous) List of 17, I don't have anything loaded on Lizzie right now.  Later this week, I'm having an internet quilting list member come to my house where I will share with her how I do things on my Lizzie.  She has the same machine and was asking on the list if there was anyone "nearby" who could show her some hands-on things.  I'm always happy to share (and, as Mr. Pirate will tell you, talk.  And talk. And talk.  :-)  )  so I invited her up.  She wants to know about everything from the ground-up: loading a quilt, pantograph, ruler work.    I've told her that I can show her how *I* do these things but that's not necessarily the ONLY way to do it.  Even if she ultimately decides that the way I do things isn't working for her, the time isn't wasted: she learned something new, decided against it and would then be able to look for a different method.  But, I hope that what I show her is actually helpful.

If I load a quilt onto Lizzie for me to work on, I'm not sure I would get it finished before my internet list buddy arrives.  It's better to simply defer my quilt until after the visit.  It's not like I have nothing else to work on. :-)


Saturday, May 04, 2013

Happy Star Wars Day!


"What's that?", you say? "There's no 'happy Star Wars day'."

Poppycock, I tell you.  *OF COURSE* there is.  It's today,  5/4.

Drum roll, please ....


May the 4th be with you!    LOL!  :-)


Wednesday, May 01, 2013

"Peace": another project finished!


The Reader's Digest version is that in July 2012, I completed the hand work on a needleturn applique wall-hanging.  The top was put on the Pile of Tops to be Quilted and there it sat.  And sat. And sat.

Eventually, it became an item on my (infamous) List of 17 (tops to be quilted).  And still it sat there.  Very patiently waiting its turn.

Which I can NOW happily say has come!  I have finished the quilting and the binding and the labeling AND the hanging sleeve!  Woo hoo!!  This puppy is done!   :-)

I'm pleased with the stitch in the ditch around the appliques; this is no mean feat with a longarm!  I *much* prefer SITD on my home sewing machine; the control is much greater.  

I'm not entirely certain I chose the absolutely, 100% "correct" quilting for the background around the applique.  It works; I think it looks fine but wonder if I couldn't have found something better if I had only looked for about a gazillion hours longer. :-)  I tend to get impatient after only a bazillion hours.

I'm *very* pleased with the binding.  There is a long, vertical, high-contrast division between the background fabric and the applique fabric.  I didn't want the binding to be a distraction so I used the applique fabric on the applique and the background fabric on the background.  Normally, when I join the ends of my binding, I do a diagonal seam.  This distributes the bulk of the seam allowance over a greater distance and makes for a flatter binding.

But if I did that on this project, the diagonal seam would be horridly obvious.  Instead, I made a straight, vertical seamline in the binding to match up with the division on the wall-hanging.


Those pictures are just teasers! For all the gory details, links and more pictures, please visit my web page for the Peace wall-hanging.


Wednesday, April 17, 2013

Manzanita: an applique project


I had finished my Hawaiian Applique project and needed a new handwork Forever Project™.  Looking in my pile(s) and list(s) of projects that I really want to do (someday, sometime), I spied a very interesting pattern, Manzanita by Random Threadz. 

[aside: there is a very similar pattern, Branching Out.  That one looks to be the same applique tree as Manzanita but the finishing details are different.  For whatever reason, I chose Manzanita .. I suppose I must have liked its finishing more than Branching Out.  I think it's too bad that we consumers would need to buy essentially the same pattern just to get the different finishing options.]

While the overall impression is rather dark and stark, the leafless branches intrigued me nonetheless.  As with any new project, I'm also trying to use supplies from my stash.  Not that I don't want to support my local stores, but I *do* have All This Fabric and should make an effort to use it.

At the beginning of this March, I found two different toned blacks for the tree and a multi-colored batik for the background.  Using the front-basted applique technique I learned from Nancy Lee Chong of Pacific Rim Quilting Company, I basted my trees to the batik background and started the applique process.

This particular project is small; the finished size is 25"x29".  The applique part is only 12"x16".  It fits nicely in my Forever Project™ box that I take with me in the car.  When I visit with my Dad on Wednesdays, it comes with me and I'm trying to *KEEP* this as a portable, away-from-home project.  (If I work on it at home, then I'll finish it in short order and then, not only will I have another top to be quilted but I'll need ANOTHER Forever Project™!).

So, progress was going slowly .. but that was OK.

Then, I was watching some TV movies and some TV shows that I had recorded but hadn't watched yet.   Generally speaking, I like to be working on some sort of hand-work when watching TV, otherwise I feel as though I'm not being productive.  Well, the only hand-work I had available was Manzanita, so out it came.

Needless to say, the applique work is now finished.

I must say that while it might not be award-winning work, *I* am exceedingly pleased with the overall look of it.  I really do love the gnarly and non-symmetrical look of the branches and stubs.  I love the little bumps and lumps.  Even with the dark fabric, these bare branches somehow feel more "alive" to me than a perfectly symmetrical and perfect design.

Now that the hand-work is completed, I have the machine piecing to do .. which means that pretty soon, I'll have another top to put on the pile.  This isn't exactly what I had in mind ... while at home, I really do want to work on the List of 17 tops to be quilted and *NOT* add another one to it!  Therefore, employing the ostrich head in the sand methodology, I am going to set Manzanita aside for a while.  All the fabric and pattern instructions are bundled together so I can easily pick it up again at some future point ... but for now .. into the UFO stack it goes.

And .... I now need a new hand-work Forever Project™!


Tuesday, April 16, 2013

Just Ducky!


I had the next top, from my infamous List of 17, to be quilted when we received an invitation to a family baby shower for one of Mr. Pirate's first cousins once removed.  Everything came to a screeching halt whilst I pondered what to make for the baby quilt.

I looked through my baby quilt ideas and finalized on a recent addition.  Does anyone else waffle over what their NEXT!  FAVORITE! project is going to be, based on what you just looked at?  It drives me nuts.

Anyway, the background is a mosaic of squares.  Along the top is a strip with appliqued rubber duckies.  All of that is surrounded by a frame and around *that* is another round of squares.

For the appliqued duck, I turned under all the edges then did a narrow zigzag (but not a satin stitch) in matching thread to hold the applique one.  Looks tidier to me than a fused and edge-stitched raw edge applique.

For the quilting, I did a continuous curve in the outer border, feathers in the yellow border and the duck wings, clouds in the sky above the ducks, stitch in the ditch around the ducks and a water ripple in the "water" area.

That picture is just a teaser! For all the gory details, links and more pictures, please visit my web page for the Just Ducky quilt.


Saturday, April 06, 2013

all my ducks lined up in a row...


Not wanting to be scrambling to finish the baby quilt at the last minute, I started thinking about which pattern to use the minute we received the baby shower invitation, this past Tuesday.  I have a directory on my computer where I stash pictures for inspiration, along with the designer and pattern information.  It's kinda like my own personal Pinterest.  :-)

I had a bunch of almost fat quarters, left over from a previous project and realized that I could use most of them up with "Just Ducky", a delightful pattern by Cheri Leffler Designs. 

The ducks are fused appliques with the raw edges held down by several rows of edge-stitching, which looks rather like a small child outlining a coloring book design.  It looks adorable .. but .. I worried about it for two reasons. 

1. This quilt was going to be a gift.  Raw edge applique, although an intriguing "new" technique, does look unfinished.  I would hate for my recipients to think that I was using some slap-dash method.

2. Since this *was* a baby quilt and I haven't done a raw-edge applique design before, I was very concerned that with repeated laundering, the fusible would detach itself, leaving the applique body to "bubble" and that the edge-stitching would come undone.  Either scenario would be horribly, horribly embarrassing.

So, I decided to machine applique those cute little ducks in place.  I turned under the edge and did a very narrow zig-zag in matching thread along the folded edge.

Furthermore, I changed up the actual ducks I used.  Since I was going to be machine zig-zagging the edge in place, I wanted a smoother edge to work on.  The ducks in the pattern have delightful tail feathers, but I wanted a simpler design.  I found exactly what I wanted at Quiltmaker; the PDF for the duck appliques can be downloaded here

I'm sure that it took longer to turn under the edges of the applique & zig-zag them down than it would if I had simply fused and edge-stitched the ducks!  But, the final result pleases me ... and that makes me happy.

I finished the piecing over 1-1/2 days .... as is typically so, I had a LOT of distractions and interruptions whilst I was piecing, so it wasn't a continuous 1-1/2 days.  This really is a very easy pattern to do.

Now that the top is down, I'll need to go get some appropriate backing.  I'm thinking of some flannel with ducks on it  .. I'm not sure if this is in vogue these days, so I'll have to see what my local stores have in stock.

As for the quilting designs .. preliminarily, I'm thinking of Water Ripple for the patchwork water, some clouds in the sky area and Carla Barrett's "Curly Swirly" in the yellow frame.

Hmmmm .. maybe not for the yellow frame.  That yellow frame is 4" wide .. certainly wide enough to do something interesting ... maybe the alternating feathers that I recently did on another quilt.  

But first .. gotta go buy that backing fabric & batting!


Wednesday, April 03, 2013

Lovely Year of Finishes: April goal


How things change in a hurry!

I have small wall-hanging that I was originally going to use as my April goal for the Lovely Year of Finishes.  The top is a needleturn applique.  I have the batting and the backing.  It's ready to be loaded.

But I procrastinated by allowing myself to be distracted by another revived hobby of mine: family genealogy & scanning of family photographs.

It was serendipitous that I did procrastinate ... we just got an invitation to a baby shower for a family member!

Now, I don't keep baby quilts on hand, so now the push will be to go through the ideas I've filed away for interesting baby quilts, pick one, pull the fabric, piece the top, quilt it, label it and bind it .... all by April 21st!!

I have no doubt that I can do this *once I decide on a pattern*!  ::knock on wood:: 

Really .... Just how difficult can a baby quilt be?   :-)


Friday, March 29, 2013

Lovely Year of Finishes: March is done!

As I stated in my previous Lovely Year of Finishes post, this top was pieced in 2008.  And now, I can finally exclaim that it is FINISHED!  woo hoo!!

Quilted. 

Labeled. 

Bound. 

Web page created!  

done, done, done, done!  :-)

I used a new-to-me thread, "Premium Select" by NanoFiber and is their Soft Antique line. It's a 40wt polyester but is finished to have a matte cotton look. So far, it's working nicely with my Lizzie, not only on this quilt but on subsequent quilts as well.

According to the time that I have to keep track of time, it took me about 9 hours spread over 3-1/2 days to do the quilting. 

Most of that time was doing all the stand along motifs in the scrappy triangles.  Each one of them required its own start and stop because I was using a thread that would have shown on the black if I had tried to sneak through.  Ugh.

I urge you to wander on over the the webpage created for this quilt.  Honest to goodness, there is more verbage and LOTS more pictures for you to look at.  :-)


Those pictures are just teasers! For all the gory details, links and more pictures, please visit my web page for the God's Eye quilt.


Friday, March 22, 2013

another donation quilt finished (almost)


After a quick start on this final donation quilt from the crate, I became distracted (oh look!  a dust mote!) by family photos and my on-going genealogy project.

But finally, I put my nose to the grindstone and finished the quilting today.  It doesn't have binding yet .. only because I don't think I have a good candidate for that.

This started out in 2011 as a mock-up for a Jane Austen quilt.  As such, I was more concerned about how to match up the diamonds across the sashing rather than making a "real" quilt.  So, I just kinda grabbed the fabric I had on hand that would do the job .. which was white sashing and muslin setting triangles.   Not exactly the most scintillating choices in the world.


But, the funny thing is .. the more I looked at it, the more I liked it.  :-)  So, I put some actual *thought* into finding border fabrics to bring it up to a useable size.  Then, it got put into the crate and waited.  And waited.  And waited.

Until now.  :-)   It's finally quilted .. oh, hooray! 

I didn't have enough batting in one piece to use, but I did have a bunch of smaller pieces.  So, I Frankensteined them together and it worked out rather well.

The backing is a lovely, soft, butter yellow flannel.  (I think this fabric contributed to some "issues".)

I loaded it on Lizzie and decided to stitch in the ditch around each and every diamond, as well as the perimeter of the white sashing.  I figured this would stabilize the entire top.  Then I'd stitch in the ditch around the inner border.  And as I advanced the quilt, I stitched down the outer raw edge to secure them, as I always do.

My thinking was that when I got to the end of the top and stitched the bottom edge, I could then release that rail and only have one layer to work with.  I could roll that one layer back and forth to get the rest of the quilting done.

I *KNOW* that I've read of others using this technique.  I'm almost sure that I've done it before.  But this time?  Problems. 

The upper half was no problem ... everything was tensioned nicely and the stitch in the ditch was progressing well.  However, once I got to the bottom half, I realized that the top was unduly "poofing up".  What the heck??  It took me some effort to quilt that without it looking ugly.

It wasn't until I had advanced the quilted part on the take-up rail that I saw there was a horrendous, ginormous horizontal tuck in the backing.  Oh. My. Gosh.  Just let me thunk my head on the wall. Repeatedly.  But other than that tuck, the quilting from the back looks pretty nice!

I have absolutely no frickin' idea how that tuck got there, much less the "poofiness" in the top.  The tuck *is* quilted down rather nicely  but ::sigh::  it's still there.  Yuck.  Dang .. and it seemed to be going quite well.  :-(

I quilted a feathered wreath with curved cross-hatching basketweave in the center.   I saw a picture of a very similar design somewhere/someplace.  Their version was nicer than mine.  :-)  I obviously need more practice on this curved cross-hatching *and* basketweave thing.

All the stitch in the ditch made the white sashing puff up very nicely .. I really do like the effect.


The striped border got widely spaced straight lines that disappear into the printed stripes.  I really hadn't a clue what to do on this fabric.  In retrospect, perhaps I should have continued the diagonal lines from the white sashing, but I wasn't sure how the diagonal quilting lines would look against the striped fabric. 


I put feathers in the setting triangles and feathers in the outer border.  Because the border fabric is a print, you can't see the feathers too well, but by this point, this was really the easiest thing I could think of doing to finish the quilt. 


Once I find some binding fabric, I'll get the label & the binding on and pop it into the washer/dryer.

Then all the donation quilts that I've been holding onto will be given to the Bay Area Crisis Nursery, which is a local one-up charitable organization that I like to support.  When they're gone, that will open a nice, big area in my sewing room.    Current status to the contrary, I really *do* like limiting the visual clutter.  (go ahead and chuckle .. y'all know what I mean!)


Monday, March 18, 2013

the ugly quilt


Well, I think the most positive thing I can say about this child-sized quilt is that it is finished.  Otherwise, I must admit that it must be the ugliest quilt I've ever done.

It wasn't intentional, though.  I'm not even sure when I made the blocks.  I think I was fooling around with strip sets and kaleidoscope/wedge rulers just to see what they were like.

Because you really can't do too much with an octagon shape until you square it up .. oh, wait, you COULD just butt them up against each other like you do with hexagons, but that would have created an ever uglier quilt, if that could possibly be imagined.   So, I squared up each block with a solid and used those same solids for sashing.

I know I picked the rust and brown fabrics simply because I had enough of them in the stash and they didn't look *terrible* with the string blocks.  Is that an awful way to pick fabrics or what? But, again, it wasn't intentional. 

Generally speaking, I like to use the test blocks and the 'fooling around' blocks that I make.  These blocks were of a good enough size that I could actually make a reasonable sized quilt with them.  I know I would have had horrible pangs of guilt had I just thrown them out, although on second thought, maybe I should have cut them down to make veterinarian cage liners ... the animals certainly wouldn't have minded.

But, I didn't make cage liners, so a child-sized quilt it is.  It'll keep some child warm and that counts for something, right?  Can you tell I'm desperately trying to find a silver lining?

I did a lot of free motion quilting on this one.  I probably should have done a pantograph, but pantograph work with my Lizzie is awkward due to the physical place I needed to put her.  So, I tend to avoid pantographs.

In retrospect, I think I just made this entire quilt with the wrong approach.  I'm not terribly pleased with it, although I *am* pleased that the top is quilted, labeled and bound.  It'll be out of my house pretty soon, which clears up some space.


This just shows you that my quilts don't always come out eye-pleasing and I do make errors in judgement .... although not usually all in the same quilt!  :-)


Sunday, March 17, 2013

Google Reader ... :-(


You've read elsewhere that as of July 2013, Google Reader is going away.  Apparently it's not pulling its weight, as other Google applications do.  ::sigh::

It works.  It works well.  It does what I want it to do.  Perhaps it's because of people like me who only need a desktop computer Reader?   (I don't have a smartphone, so I obviously don't need a mobile app for that).

But, even if Reader doesn't make any money for Google, why not just let it *stay* as-is?  Don't do any more updates.  Assign one programmer to handle the situations that break Reader, otherwise, just leave it be!   It can happily sit in the background of Google and let people use it.  Let it be a deprecated product.  As long as it still works, users will be happy.

Heck,  I'm such a stick-in-the-mud that my email program has been deprecated for *years*.  I started, years and years and years ago, with Eudora.  I like Eudora. It does everything that I want it to do for a email program.  I'm used to the way it looks and works.  Qualcomm got rid of it years ago and Corel doesn't support it any longer.  But ya know what?  I don't care.  *IT STILL WORKS*.  And so, I continue to use Eudora as my emailer.

 But, except for death and taxes, all things change.  If Google is going to yank Reader, I'll need to find a replacement.  I've looked at the suggestions for an alternative.   There have been many blogs with such suggestions .... just Google for them.

Many of the replacements that I've seen focus on mobile apps.  That doesn't interest me.  What I want is something that gives me the look-and-feel of Reader so that I don't have to jump through a whole bunch of new hoops to figure out how to read my blogs.  And I definitely don't need a touch-screen appearance ... gah!  that would drive me nuts!

Enter "The Old Reader".   The following description is from a Life Hacker blog entry by Alan Henry:
The Old Reader may be in beta, but it was built to be a suitable replacement for Google Reader. And not just Google Reader as we know it now, the old Google Reader, that still had plenty of tools for sharing and organization. You can log in via Google or Facebook, and import your feeds from Google Reader or any other service via OPML. If the interface looks familiar, it should: it looks a lot like Google Reader, complete with folders down the left side, your list of stories in the main pane (click any to read), and one-click subscription to new feeds. You get many of the same keyboard shortcuts, and even get the same ability to follow other Old Reader users and share interesting stories with them—the way you used to be able to with Google Reader. The Old Reader is fast, free, and super simple to use. There are no mobile apps yet, but the web site works well on mobile devices, and the developers behind it note they're working on it. There are, however, Chrome and Safari extensions for it.
Hear that???   It has the same look-and-feel as Reader!   Oh, be still, my beating heart!   Truthfully, I never knew there was a Google Reader appearance before the one I'm currently using.  Or maybe the Google Reader I'm using *IS* the old format.  Who cares?  All I know is that The Old Reader is familiar enough for me to feel immediately comfortable.

Apparently 18,776 other people feel the same way because that's how many are in front of me in the import queue.  I have no idea how many users there are, currently.   The Old Reader people said that their user base increased 7 times at once, so understandably, they are having "just a bit" of an import log jam.  They are very good about keeping users apprised of the situation, so we won't think that our import file has become lost in cyberspace.

Not to worry, Google Reader is good until July.  By that time, The Old Reader will have worked out the queue length; I'm happy to wait.  If I find new blogs between now and then, I can individually add them, just like I currently do with Reader.  When my import file is processed, those individually added blogs  will not be clobbered.

So, I think I've found my replacement.  As much as I really, really, really dislike changing computer components, this one is looking pretty good.


It was National Quilting Day


.. which was yesterday, of course, but I never quite got around to writing a blog entry about it on time.  Story of my life, ya know?

However, I was busy!  Quilting, no less!  When I was excavating my sewing room recently, I came across a long-buried crate that contained 5 quilt tops that were tagged to be given to a local charity that I like to support, the Bay Area Crisis Nursery.

These tops have been ... ::ahem::  "aging" for quite some time.  I decided that it was time I got them quilted.   This would not only allow the Crisis Nursery to have more quilts to give to their charges, but it would free up a crate in my sewing room!  

The top that I actually DID quilt on National Quilting Day was (.. of course ...) finished rather late at night so that there was absolutely NO decent lighting to take a picture.  Y'all will need to wait until tomorrow (or later) to see that particular quilt.

I have 3 of the tops to share with you right now.  One nice thing about all these child's quilts is that, being so small, they do quilt up VERY fast.  It's certainly instant gratification for me!  :-)

Back in January 2012, I participated in a quilt along, called Oh My Stars! 

I made many more star blocks than I needed for the project quilt, so that I was able to create a bonus baby quilt. 

Because I just wanted to get these tops quilted and not spend a whole lot of time devoted to intricate quilting, I actually used a pantograph for this quilt. 

I usually don't do pantographs very often.  The physical constraints of the layout where I have my Lizzie make for a very cramped area.  It's awkward to work in, so I tend not to want to do pantographs so much. 


 This quilt, and the one after, were created from some very unusual yardage.  Back in 2010, I found fabric that had rows of quilt blocks printed from selvage to selvage, rather like a pre-printed row robin.  It was called "Borders and More".  The intent was that you would cut the rows apart and use them as instant borders for centers that you piece yourself.  It was an intriguing idea, so I bought some yardage (I don't remember how much). 

But as time went by, I realized that I was just never going to use the fabric as it was intended.  Instead, I simply used it as-is. 

For the first quilt, I cut off a chunk of the yardage and quilted it, using the edges of the printed blocks as pseudo-seams.  What you see in the picture to the right is exactly what the yardage looked like, right off the bolt, except that .. trust me ... the quilt in the picture at right really IS quilted!

I did "stitch in the ditch" in all the pseudo-seams.  It really wasn't as difficult as you might think ... there weren't any real seams to be concerned with.  I used black thread, which disappeared into the black background, so if my stitch in the ditch was exactly gnat's eyelash perfect, it really wasn't noticeable.

However, this does mean that you can't really SEE any of the quilting at all from the front!   For this quilt, and the next one, I just wanted to get it quilted and wasn't terribly concerned about fancy stitching.  The printed rows were nifty enough; I felt that overt quilting would be a distraction.


The second quilt made from this yardage had a different treatment: because the leftover yardage wasn't large enough to be a quilt on its own; I needed to stretch it with a very wide border. 

I found enough of the purple fabric in my stash for the border.  Although there is no purple in the print yardage itself, I think the border works surprisingly well.  :-)

As with the first border print quilt, I also did a stitch in the ditch along all the pseudo seams.  I quilted an embellished meander in the purple fabric; a double loop-de-loop.

All of these quilts are small .. about 45" x 60" or so.  They are intended for the younger kids that the Crisis Nursery cares for.

I haven't made webpages for these quilts yet, so I can't *quite* count them as 'done'.  And because there are no webpages, there aren't any up-close, detailed pictures nor any of the typical gory details that I usually provide.  All of *those* items will be on the webpages!  You'll just need to wait.  :-)

The main reason for posting the pictures now was to prove that I am still alive and kicking!